Увод
Јефтине торбе за бицикл обично не „пропадају“ на драматичан начин. Не успевају на путу до града: патентни затварач почиње да прескаче, кука развија покрет, шавна трака се подиже у углу, и одједном ваша торба постаје бучна, климава и сумњиво влажна унутра. Ако сте икада помислили „Било је добро за првих неколико вожњи“, упознали сте праву тему овог водича: зашто јефтине торбе за бицикле рано пропадају углавном се ради о интерфејсима — патентним затварачима, шавовима, кукама и зонама абразије — који испуњавају дневне вибрације, песка и циклусе оптерећења за које никада нису дизајнирани да преживе.
Овај чланак није овде да срамоти буџетску опрему. Ту је да вам помогне да дијагностикујете механизме квара, примените брза решења и – ако купујете поново – одаберете минимални квалитет израде који наџиви вашу стварност у вожњи. Добићете мерљиве граничне вредности (опсеге килограма, распони понитеља, времена тестирања), једноставне методе верификације, контекст усклађености (стандарди за испитивање видљивости и текстила) и контролну листу за контролу квалитета која је окренута купцу за свакога ко има произвођач торби за бицикле.
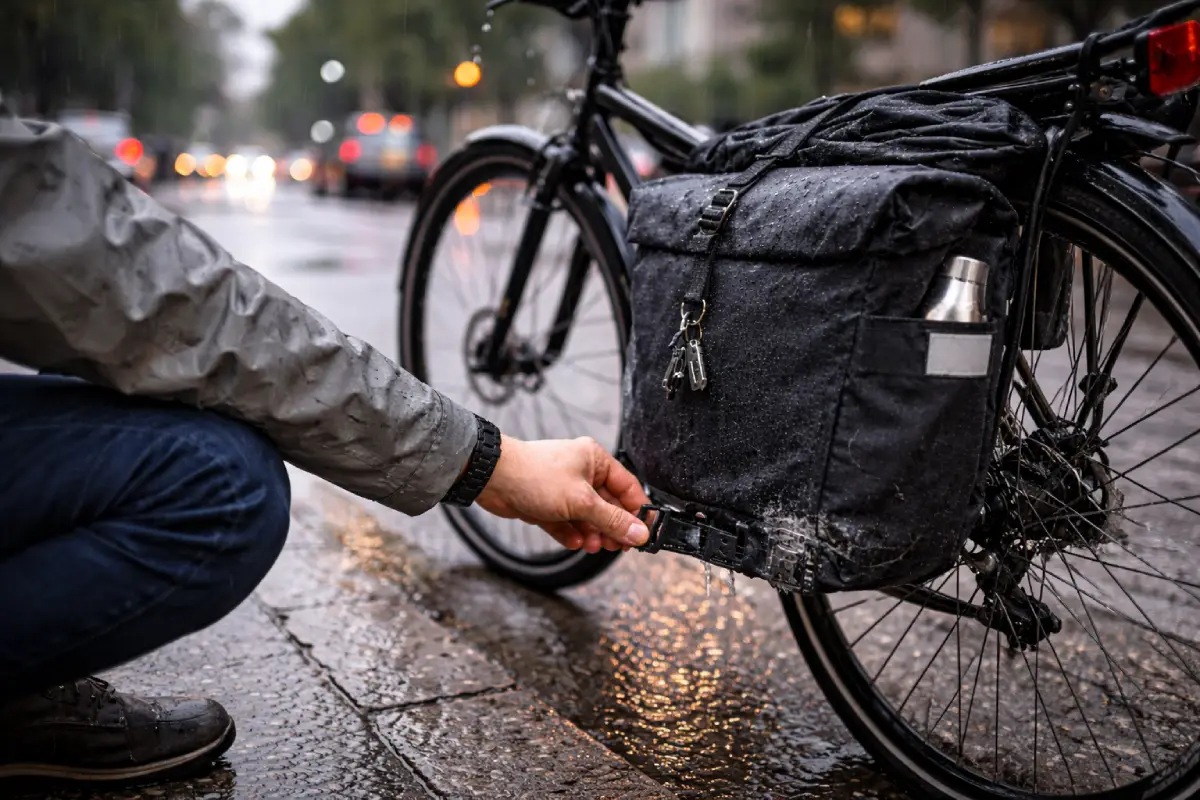
Провера реалности на кишном путу на посао: стабилизација доње копче кофера помаже у спречавању љуљања и раних кварова уобичајених у јефтиним торбама за бицикле.
Мапа неуспеха: Где се јефтине торбе за бицикле прво покваре
Четири интерфејса који одлучују о животном веку
Већина раних неуспеха долази из четири зоне:
-
Отвори и затварачи (рајсфершлуси, ролл-топ ивице, шавови са преклопом)
-
Системи за монтажу (куке, шине, стабилизаторске копче, каишеви)
-
Хидроизолациона структура (шавови, траке, завари, ивице премаза)
-
Зоне хабања (доњи углови, области у контакту са сталком, анкери за траке)
Ако је било који од ових интерфејса недовољно изграђен, свакодневна вожња претвара „мању слабост“ у „недељни проблем“.
Зашто су „дневне вибрације“ прави тест материјала
Торба на бициклу доживљава хиљаде микро-удара по вожњи. Чак и глатка градска рута има рампе ивичњака, пукотине и импулсе кочница. Поновљено савијање је проблем: лепкови пузе, нити лабаве, премази пуцају на линијама прегиба и замор тврде пластике - посебно по хладном времену. Јефтина опрема често користи материјале адекватног изгледа, али методе спајања и толеранције су оно где се трошкови смањују.
Грешке затварача: Зашто „ради данас“ постаје „заглављено сутра“
Шта се заправо дешава када рајсфершлус торбе за бицикл је покварен
Кад људи кажу рајсфершлус торбе за бицикл је покварен, то обично значи један од ових режима квара:
-
Одвајање зуба: зупци патент-затварача се више не спајају чисто
-
Хабање клизача: клизач губи снагу стезања и „отвара се“
-
Изобличење траке: трака од тканине око патентног затварача се растеже или копча
-
Корозија и пијесак: клизач се везује испод соли + прашине + воде
-
Стрес преоптерећења: патент затварач се користи као стезаљка за преоптерећење вреће
Заједничка нит: патентни затварачи су прецизни делови. Свакодневна прљавштина и оптерећење брзо кажњавају клизаче и траке са ниским спецификацијама.
„Порез на прекомерну робу“ (зашто капацитет лежи)
Врећа од 12–15 Л која је стално напуњена до 110% капацитета ефикасно спроводи стрес тест на патент затварачу сваког дана. Чак и ако је патентни затварач пристојно оцењен, околна трака и шавови можда неће бити. Практично правило је да задржите 15–20% „блиске маргине“. Ако се увек борите да га затворите, истрошите га.
Поређење дизајна затварача (стварност у свакодневном животу)
| Тип затварања | Брзина | Типичан ризик од квара | Најбољи случај употребе |
| Отварање затварача | брзо | висока (пескост, преоптерећење) | чест приступ, лагано до средње оптерећење |
| Ролл-топ | спорије | средњи (замор на преклопу, хабање ивица) | дуготрајна киша, већа оптерећења |
| Преклоп + копча | средње | ниско до средње | мешовито време, једноставна издржљивост |
| Хибрид (зип + преклоп) | средње | средње | компромис; зависи од конструкције |
Јефтини дизајни често бирају рајсфершлусе за „лак приступ“, а затим подграде клизач, траку и појачање шавова. Зато прво видите проблеме са патентним затварачем у буџетским торбама.
Поправке на терену које заправо помажу (без претварања чуда)
-
Очистите стазу са патент затварачем водом и меком четком након мокрих вожњи
-
Избегавајте сабијање тврдих предмета уз линију затварача (браве и алати су уобичајени кривци)
-
Ако затварач прескаче, проверите да ли је клизач истрошен; благо затегнути клизач може привремено да поврати силу стезања, али то није дугорочно решење ако су зуби или трака оштећени
-
Зими, остаци соли убрзавају корозију; испирање и сушење може значајно продужити животни век
Недостаци хидроизолације: Када „водоотпоран“ престане да буде водоотпоран

Конструкција шавова је важнија од тврдњи о тканини — заварени шавови смањују путеве цурења, док залепљени шавови зависе од дуготрајне адхезије траке.
ста водоотпорна торба за бицикл не успева на киши заиста значи
Кад неко пријави водоотпорна торба за бицикл пропада на киши, ретко је главна плоча од тканине. Скоро увек је једно од ових:
-
Подизање траке шавова на угловима или линијама преклапања
-
Зашијте рупе које упијају воду (рупе за игле су путеви за цурење)
-
Затварање (вода се скупља око гараже са затварачем или ивице преклопа)
-
Одводњавање ивица (вода улази на траку за везивање, ваљане рубове или сечене ивице)
-
Облагање микро-пукотина (посебно код поновљених прегиба)
Хидроизолација је систем, а не ознака. Јефтине торбе често користе обложену тканину пристојног изгледа, а затим губе игру у конструкцији шавова и дизајну отварања.
Конструкција шавова: лепљена вс заварена (зашто су углови важни)
| Приступ шавовима | Типичан ризик од цурења током времена | Шта гледати |
| Прошивено + залепљено | средње до високе | подизање траке на угловима; пузање лепка након циклуса савијања |
| Заварени шавови (врући ваздух / РФ стил) | ниско до средње | раслојавање ивица ако је квалитет шава недоследан |
| Само спојено (без траке) | висока | цурење кроз иглу, посебно под прскањем |
У свакодневној употреби, углови су тамо где се трака прво подиже јер углови виде највећи напон савијања. Ако се ваша торба свакодневно мота, пресавија или компресује, трака ће брже старити.
Премази и ламинације (практична издржљивост, а не маркетинг)
Дениер (Д) вам говори о дебљини предива, а не о водоотпорном квалитету. Премаз и ламинација одређују дугорочне перформансе баријере.
| Тип градње | Типичан осећај | Дугорочна водоотпорна поузданост | Уобичајени неуспех |
| ПУ-обложена | флексибилан | средње | љуштење или стањивање на местима трљања |
| ТПУ-ламиниран | глатка, робусна | висока | деламинација на ивицама ако је слабо спојена |
| ПВЦ слој | веома тврд | висока | крутост пуцање на поновљеним прегибима |
Ако се често возите по киши, структура је важнија од захтева: заштићени отвори, ојачани углови и стратегија шавова.
Једноставан кућни тест који брзо открива истину
Провера прилагођена путницима:
-
Ставите суве папирне убрусе унутра
-
Прскајте врећу (посебно шавове и отворе) 10-15 минута
-
Отворите и мапирајте влажна места (углови, крајеви са патент затварачем, доња линија шавова)
Ово не захтева лабораторијску опрему, али реплицира стварне путеве квара: спреј + гравитација + напрезање шава.
Љуљање, звецкање и лабави носачи: Скривени убица торби за бицикле
Зашто ломе куке чешће од кидања тканине
Када ломе куке, обично је зато што систем кука никада није био стабилан у почетку. „Мало игре“ постаје „пуно игре“ под вибрацијом. Када кука зазвецка, она:
Јефтине куке често користе крхку пластику, танке зидове куке, лабаве толеранције и слабе опруге. У хладном времену, пластика постаје мање отпорна на ударце, а пукотине се могу појавити након једног оштрог ударца.
Физика љуљања (зашто се осећа горе него што изгледа)
Сваи се појачава полугом. Ако торба лежи даље од средишње линије бицикла, лук кретања расте. Мала осцилација постаје приметна љуљања, посебно у кривинама и кочењу.
Практични прагови стабилности (прилагођени путницима):
-
Торбе на управљачу су најпредвидљивије са 1–3 кг; изнад 3–5 кг управљање може бити тешко
-
Вреће за седла су најсрећније са 0,5–2 кг; изнад тога, замах се повећава
-
Задњи сандуци обично носе укупно 4–12 кг (обе стране), али само ако је систем кука затегнут и доњи стабилизатор ради свој посао

Упоредно поређење које показује како лабав држач торбе изазива љуљање и вибрације, док доњи стабилизатор држи торбу стабилном током свакодневног путовања.
Поправљање љуљања торбе за бицикл (шта заправо ради)
Прави поправка љуљања торбе за бицикл је обично комбинација три корака:
-
Затегните горње куке тако да се торба не може подићи или звецкати о шину
-
Користите доњу стабилизаторску копчу/каиш да спречите ротацију (то је контрола скретања)
-
Пакујте густе предмете ниско и према страни полице, а не на спољној ивици
Ако можете физички да померите торбу са једне на другу страну за више од око 10–15 мм на дну када је монтирана, осећаће се нестабилно на путу. Тај покрет постаје абразија и замор хардвера.
Трљање оквира и хабање: како торбе оштећују бицикле (и себе)
Зашто бициклистичка торба трља боју оквира је проблем дизајна + подешавања
Када торба за бицикл трља боју оквира, то је обично због једног од ових:
-
недовољан размак између држача торбе и оквира/сталка
-
удар петом који изазива поновљене погурке
-
љуљање вреће гурајући доњу ивицу у контакт
-
песак заробљен између вреће и оквира делује као брусни папир
Када трљање почне, обе стране губе: фарба се изгребе, а премаз и тканина торбе се брзо троше.
Зоне ношења: где се најпре тањи буџетске торбе
Већина оштећења од хабања се јавља на:
-
доњи углови (спреј + песка + контакт ивичњака)
-
контактне линије сталка (посебно ако торба звецка)
-
сидра за траке (концентрација напрезања + цепање шавова)
-
везивање на ивицама (ломи се након вишекратног трљања)
Дениер и животни век путовања на посао (корисно правило)
Не треба вам „максимални дениер“. Треба вам довољно за ваш циклус злостављања.
Типични практични домети:
-
210Д–420Д: може радити за лака оптерећења и глаткије руте; треба појачање
-
420Д–600Д: уобичајено место за издржљивост на свакодневном путу на посао
-
900Д+: жилав, често тежи; добар за абразивне плоче, није увек потребан свуда
Ако је ваша рута груба или рутински носите 6–10 кг, 420Д–600Д плус ојачани углови су солидна основа.
Проблем са хардвером: копче, копче и тачке шавова под стресом
Јефтин хардвер не ради на екстремним температурама
Хладноћа чини многе пластике мање отпорним на ударце. Излагање УВ зрачењу стари полимере. Свакодневно савијање и замор од вибрација прво најслабију геометрију: танке куке, оштри унутрашњи углови и недовољно ојачане копче.
Шивање је инжењерска одлука, а не декорација
Шавови стварају рупе за игле. Они такође стварају линије стреса. Добра конструкција користи:
-
закрпе за појачање на анкерима
-
шеме за шивање које шире оптерећење (не само једну линију)
-
дебљи конац где је напетост велика
-
повез који штити ивице без увлачења воде унутра
Јефтине конструкције често смањују густину шавова или прескачу закрпе за појачање. Тако се каишеви тргају чак и када главна плоча изгледа добро.
„Тест злоупотребе путника“ који можете да поновите за 30 минута
Тест оптерећења (групе у кг) са критеријумима прошао/није прошао
Искористите свој прави терет. Ако дневно носите 6–8 кг, тестирајте на 8 кг. Ако је 10 кг, тестирајте на 10-12 кг.
Критеријуми за пролаз:
-
торба не звецка
-
монтажа се не помера након удараца
-
нема ударца петом током педалирања
-
затварачи раде без присиљавања
Сигнали за неуспех:
Симулација вибрација (безбедна верзија)
Не морате да прескачете ивичњаке. Возите се по грубој површини или неколико неравнина безбедним темпом. Ако торба почне да "говори" (звецкање), то вам говори нешто о толеранцији и монтажи.
Тест на кишу (10–15 минута) са мапирањем цурења
Метода папирног пешкира:
-
суви пешкири унутра
-
спреј шавови, углови, отвори интерфејса
-
прво проверите да ли има влаге на крајевима патент-затварача и на доњим шавовима
Врећа може да прође „благу кишу“, али не изложи прскање точкова. Прскајте одоздо и бочних углова да бисте имитирали право путовање на посао.
7-дневна контролна листа (шта предвиђа рани неуспех)
После недељу дана стварне употребе:
-
прегледајте доње углове да ли је премаз туп или огребан
-
проверите затегнутост куке и било какву нову игру
-
потражите подизање траке на угловима шавова
-
проверите глаткоћу затварача (зрнатост се често показује рано)
-
потражите контактне ознаке оквира
Ово претвара „можда је у реду“ у доказ.
Када је јефтино заправо добро (и када је загарантовано жаљење)
Случајеви коришћења ниског ризика (јефтино може бити разумно)
-
повремене вожње (1-2 пута недељно)
-
мала оптерећења (испод ~4 кг)
-
само лепо време
-
глаткије руте са минималним вибрацијама
Случајеви високог ризика (овде јефтино брзо не успе)
-
дневно путовање са теретом од 6–12 кг
-
ношење лаптопа (ударац + ризик од влаге)
-
зимско јахање (сол + хладно + песка)
-
неравни путеви и честе рампе ивичњака
-
дуго излагање киши или прскање јаких точкова
„Образац жаљења“ је предвидљив: јефтина торба → рани отказ интерфејса → друга куповина. Ако сте у високоризичном случају коришћења, купујте за интерфејсе, а не за капацитет.
Куповина за масовне и ОЕМ поруџбине без претварања овога у оглас
Специфична питања која брзо откривају квалитет
Ако тражите извор торбе за бицикле на велико или изградњу ОЕМ пројекта, најбоља питања су механичка:
-
Који дениер и који тип премаза/ламинације се користи за главне и основне панеле?
-
Који приступ шаву се користи (залепљени, заварени, хибридни)?
-
Који је материјал куке, приступ дебљини зида и политика замене?
-
Који је опсег толеранције за постављање куке на стандардне шине?
-
Како су ојачани анкери за траке (величина закрпе, узорак убода)?
Ево где Контрола квалитета ОЕМ торби за бицикле важнији од тврдњи у брошури.
Контролне тачке за контролу квалитета које спречавају скупе поврате
-
рајсфершлус глаткоћа доследност преко серије
-
лепљење шавне траке на угловима након циклуса савијања
-
кука се уклапа (без звецкања на стандардној полици)
-
абразијско ојачање на угловима базе
-
тест воде на лицу места на отворима интерфејса
А способан фабрика торби за бицикле требало би да буде удобно разговарати о томе. Ако добављач говори само о естетици и капацитету, то је знак упозорења.
Трендови у индустрији (2025–2026): Зашто неуспеси постају „видљивији“
Промена репелентности без ПФАС мења разговор
На глобалним тржиштима, трајна водоодбојна хемија се помера ка приступима без ПФАС. То генерално значи да структура постаје важнија: боље ламинације, бољи дизајн шавова и мање „хемијских обећања“. Купци све више процењују квалитет градње, а не да облажу флоскуле.
Више модуларних система који се могу поправити
Путници желе заменљиве куке, делове који се могу сервисирати и дужи животни век. Замена хардвера је тренд јер је јефтинија од замене целе торбе - и смањује отпад.
Очекивања у погледу видљивости и безбедности расту
Многа тржишта наглашавају видљивост за бициклисте, посебно у условима слабог осветљења. Торбе које блокирају задња светла или немају практичан рефлектујући положај сматрају се лошим дизајном, а не личним преференцијама. Стандарди и смернице у вези са упадљивим и рефлектујућим материјалима подстичу брендове да третирају видљивост као функционални захтев.
Закључак
Јефтине торбе за бицикле покваре рано из једноставног разлога: често су направљене да изгледају исправно, а не да преживе понављајуће вибрације, песка и циклусе оптерећења на интерфејсима који су важни. патентни затварачи се троше јер су преоптерећени и контаминирани; хидроизолација не успева на шавовима и отворима, а не на „водоотпорној тканини“; куке се ломе јер се мали зазор претвара у пукотине од замора; а абразија и трљање уништавају премазе много пре него што се тканина панела поцепа. Ако желите да избегнете замку друге куповине, купујте интерфејсе (куке, шавови, углови, затварачи), одржавајте реалне границе оптерећења и покрените поновљив 30-минутни тест злоупотребе на радном месту пре него што верујете торби са својим дневним потрепштинама.
ФАКс
1) Зашто се патентни затварачи торби за бицикл тако брзо ломе?
Затварачи се брзо ломе када се с њима поступа као са стезаљкама за компресију и када раде у прљавом, влажном окружењу. Најчешћи квар није „затварач је слаб“, већ то што клизач губи снагу стезања након вишеструког напрезања, што узрокује одвајање зуба и прескакање. Прекомерно пуњење то убрзава јер је рајсфершлус стално под затезањем чак и када је затворен. Грит то погоршава брушењем клизача и зуба; зимска со може подстаћи корозију и грубо кретање, посебно ако се патент затварач не испере након мокрих вожњи. Практичан начин да се продужи век рајсфершлуса је да се задржи маргина капацитета 15–20% тако да се рајсфершлус затвара без присиљавања и да се избегне постављање тврдих, густих предмета (као што су браве или алати) директно уз линију патентног затварача. Ако патентни затварач почне да прескаче, клизач се може истрошити; привремено затезање може помоћи, али то је обично знак да систем затварања долази до краја свог животног века за свакодневну употребу.
2) Како да спречим да се торбе љуљају или звецкају?
Љуљање је обично проблем толеранције монтаже и паковања, а не проблем „ваше вожње“. Прво, елиминишите зрачност на горњим кукама: торба треба да стоји чврсто на шини за сталак без шкљоцања када је протресете руком. Друго, користите доњу стабилизаторску копчу или каиш да спречите ротацију торбе на дну; ово је најчешћи корак који недостаје на буџетским торбама. Треће, препакујте са правилом стабилности: држите густе предмете ниско и према страни сталка, а не на спољној ивици где повећавају полугу. Ако можете да померите дно торбе више од око 10–15 мм у страну док је монтирано, вероватно ће се љуљати на путу. Такође проверите размак пете, јер ударац петом може да створи поновљене погурке који се осећају као „љуљање“. Ако су куке напукнуте или се не уклапају, замена кука понекад може спасити торбу; ако је плоча за монтажу флексибилна и куке су пластичне ниске квалитете, најпоузданије решење је надоградња на стабилнији систем кука.
3) Шта узрокује цурење водоотпорних торби за бицикле након неколико недеља?
Већина „водоотпорних“ торби цури на шавовима и отворима, а не кроз главне плоче од тканине. Класично рано цурење је подизање шавова траке на угловима јер углови доживљавају велики напон савијања сваки пут када носите, сабијате или савијате торбу. Још један уобичајени квар је упијање на крајевима патент-затварача или везивање ивица где вода улази и путује дуж слојева тканине. Премази се такође могу деградирати на тачкама абразије—доњи углови и контактне линије сталка—нарочито када је присутан пијесак. Једноставна дијагностичка метода је тест папирним убрусима: ставите суве папирне убрусе унутра, прскајте шавове и спојеве затварања на 10-15 минута, а затим мапирајте где се појављује влага. Ако се влажне мрље скупљају на угловима и крајевима са патент затварачем, проблем је геометрија конструкције и заптивање интерфејса, а не то што торба „није водоотпорна тканина“. Дугорочна поузданост се побољшава када су отвори заштићени (затварачи на роло или добро заштићени) и када је стратегија шавова робусна (заварени шавови или добро изведени шавови са траком са добрим дизајном углова).
4) Како могу да спречим да торба за бицикл трља моју боју за оквир?
Трљање оквира је обично узроковано недовољним зазором, љуљањем или пијеском заробљеном између контактних тачака. Почните тако што ћете проверити да ли торба додирује оквир или сталак остаје када је потпуно напуњен; многе вреће изгледају добро празне, али падају у контакт испод 6–10 кг. Затим смањите љуљање тако што ћете затегнути горње куке и користити доњи стабилизатор како се торба не би ротирала у оквиру. Удар петом такође може током времена да гурне корпу ка унутра, тако да потврдите да ваша нога не гура торбу током педалирања. Када је зазор фиксиран, обратите пажњу на зрнатост: ако кеса чак и лагано додирне оквир, прашина са пута постаје абразивна паста и боја ће брзо отупити. Ради превенције, обезбедите стабилну монтажу, држите густе предмете ниско и повремено чистите контактне површине. Ако ваше подешавање неизбежно прође близу, коришћење заштитног филма или штитника на зони контакта оквира може смањити козметичка оштећења, али то не би требало да се користи као изговор за игнорисање нестабилности монтирања.
5) Колико дуго треба да траје торба за бицикл за свакодневна путовања?
Животни век зависи од оптерећења, вибрација руте, изложености временским приликама и квалитета интерфејса. За свакодневна путовања (5 дана недељно) са умереним оптерећењем око 6–10 кг, добро конструисана торба обично треба да остане стабилна и функционална током више сезона, док јефтина торба може показати деградацију интерфејса у року од недеља до месеци – посебно на патент затварачима, кукама и угловима шавова. Реалан начин размишљања о животном веку су циклуси: свака вожња је циклус савијања + вибрација, а свако ношење је циклус напрезања на анкерима и плочама за монтирање. Ако се возите грубим путевима, користите зимске руте за слану воду или се често возите по киши, најслабији интерфејс торбе ће се показати рано. Можете продужити животни век смањењем звецкања (игра убрзава хабање), избегавањем прекомерног затварања и провером зона хабања једном недељно током првог месеца. Ако куке почну да се отворе или трака за шавове почне рано да се подиже, то је обично показатељ да торба неће преживети дуготрајну свакодневну употребу без поправке или замене делова.