Кратак резиме: Одабир водоотпорних торби за бицикле за кишно време углавном се односи на конструкцију, а не на слогане. За свакодневна путовања по мокрим путевима, дајте предност отвору на котрљају или добро заштићеном отвору, запечаћеним шавовима (завареним или висококвалитетно залепљеним) и ојачаним доњим панелима који преживљавају прскање и песка са точкова. Користите практичне опсеге оптерећења (управљач 1–3 кг, седло 0,5–2 кг, рам 1–4 кг, паннијери укупно 4–12 кг) да бисте одржали стабилно управљање на клизавим путевима. Потврдите тврдње једноставним тестовима у стварном свету (10–15 минута туширање + спреј под малим углом + мапирање цурења папирних пешкира) и очекујте да ће се тржиште померити ка репелентима без ПФАС-а, чинећи структурну хидроизолацију још важнијом.
Увод: Киша претвара „складиштење“ у безбедносни проблем
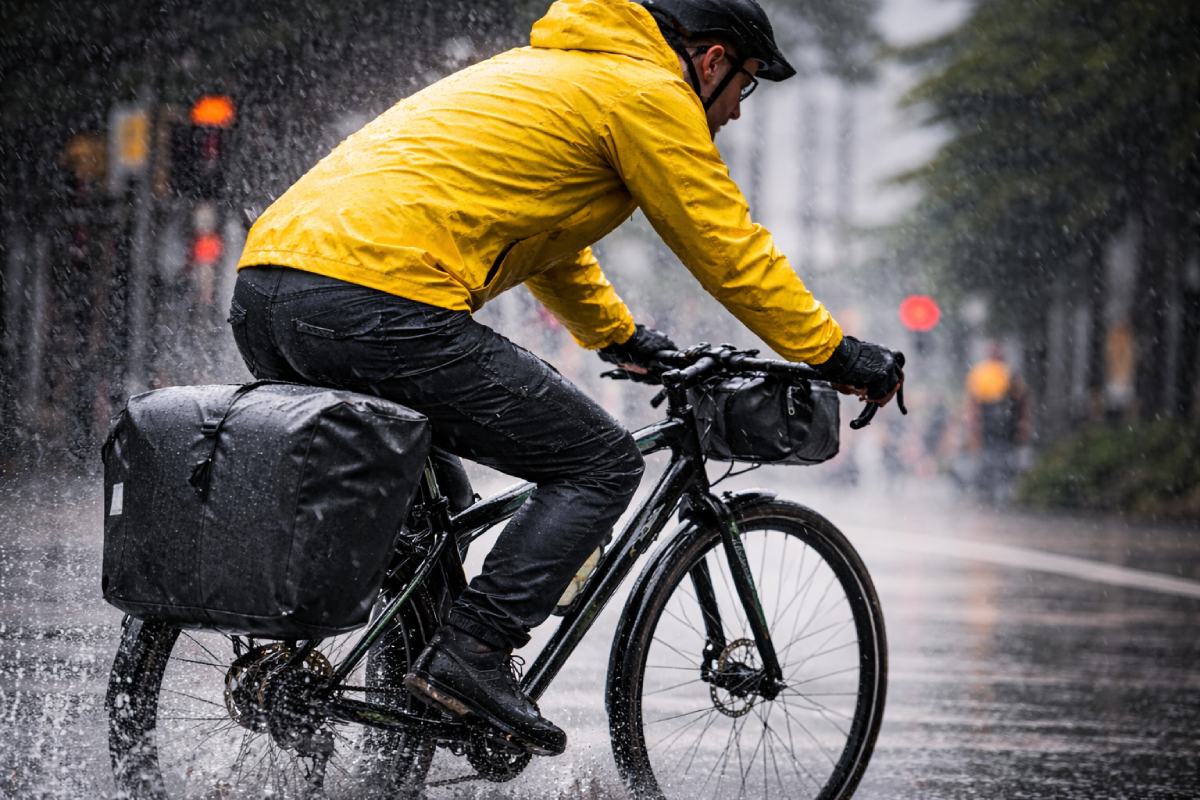
Ако сте икада кренули на нормално путовање и ударила вас је изненадна киша, већ знате истину: вода вас не мокри само – она мења начин на који ваш бицикл управља, како вас возачи виде и колико брзо мале грешке постају скупе. Натопљен лаптоп, преоблачена одећа или телефон који умре на путу су досадни. Али већи проблем је ритам: зауставити се испод тенде да поново спаковати, петљати са мокрим патентним затварачем или возити ометено јер сте забринути да вам опрема цури.
Бирање водоотпорне торбе за бицикле је мање о куповини „ствари која изгледа најводоотпорније“ а више о усклађивању заштите са кишом по којој се заиста возите. Овај водич је направљен за стварне услове: прскање точкова, шљунковити путеви, поновљено отварање/затварање и дуго време излагања. Научићете како да процените материјале (дениер и премази), конструкцију (заварени шавови наспрам залепљених шавова), системе затварања (ротирајући врх против рајсфершлуса), стабилност оптерећења (прагови килограма) и трендове усклађености који обликују следећу генерацију опреме за кишу.
На крају ћете моћи да изаберете водоотпорне торбе за бицикле за кишно време који остају суви, возе стабилно и не распадају се након једне сезоне песка.
Путовање по јакој киши са једним водоотпорним сандуком: права заштита за зону прскања без подешавања за обилазак.
Мапа брзе одлуке: изаберите свој водоотпорни ниво за 90 секунди
Почните са временом експозиције, а не „колико јако пада киша“
Два јахача се могу суочити са истим временом и потребна им је потпуно другачија заштита. Најважније је колико дуго вода удара у врећу и колико прскања види.
Кратка експозиција (5–15 минута): можете се извући са пристојном отпорношћу на прскање ако је ваш садржај ниског ризика.
Средња експозиција (15–45 минута): киша плус спреј са точкова је место где „водоотпорне” кесе често покваре.
Дуга експозиција (45–120+ минута): потребна вам је права водоотпорна конструкција, а не само обложена тканина.
Одлучите шта у торби мора остати суво
Немају сви уређаји исту толеранцију. Мокра кишна јакна је у реду. Мокри пасош, лекови, папирна документа или електроника су квар на путу.
Практично правило које користе многи путници на посао је „нулто цурење за електронику, мало цурење за одећу“. То значи да или бирате прави водоотпорни систем врећица или одвајате свој садржај у заштићено језгро (електроника у затвореној унутрашњој торбици) плус све остало.
Табела коју можете користити пре куповине
| Изложеност киши у стварном свету | Типичан ризик од мокре | Препоручени ниво торбе | Уобичајена тачка квара |
| Слаба киша, кратка вожња | Капље, влажна тканина | Водоотпоран + унутрашња торбица | Процјеђивање затварача |
| Стална киша, 20–40 мин | Спреј + намакање | Водоотпорна тканина + залепљени шавови | Пилинг траке за шавове |
| Јака киша, 40–90 мин | Притисак + удруживање | Заварени шавови + ролл-топ затварање | Систем отварања цури |
| Киша + пијесак + свакодневна употреба | Абразија + умор | Ојачани панели + издржљиво затварање | Доње хабање |
Овде многи возачи греше: купују на основу „интензитета кише“, а не „трајања излагања и прскања“.
Водоотпоран наспрам водоотпоран: дефиниције које заустављају лоше куповине

Затварачи на роло обично су отпорнији на дуготрајну кишу боље од отвора са патентним затварачем у стварним условима прскања на посао.
Зашто „водоотпоран“ не успе на стварним путовањима на посао
Водоотпорне торбе обично зависе од обложене тканине плус стандардне шавове. На бициклу, торбу не пада само киша – прскају је прскање са точкова и ситна зрна. То је другачија врста напада.
Уобичајени начини на који вода улази:
-
Кроз рупе за игле. Шивање ствара линију микро отвора. Чак и са премазом, вода може да се провуче под сталним влажењем.
-
Кроз рајсфершлусе. Већина рајсфершлуса је прва слаба тачка. Вода проналази празнине, а гравитација чини остало.
-
Кроз флекс тачке. Опрема за кишу отказује тамо где се савија: углови, набори и шавови под затезањем.
Ако се само повремено возите по благој киши, водоотпорност може бити прихватљива. Ако путујете свакодневно у влажним месецима, „водоотпоран“ често постаје „на крају мокар“.
Шта водоотпоран треба да значи у смислу торбе за бицикле
Прави водоотпорни систем торби за бицикле штити од:
-
Директне падавине одозго
-
Спреј за точкове одоздо
-
Дуга експозиција током времена
-
Поновљени приступ (отварање/затварање)
-
Абразија од песка и вибрација
Зато водоотпорне торбе за бицикле за кишно време су више о грађевинарству него о маркетиншким терминима.
Материјали који су заиста важни: Дениер, премази и ламинација
Дениер (Д) је мера која се односи на дебљину предива. Већи Д често сугерише чвршћу тканину, али то није гаранција. Густина ткања, тип премаза и распоред арматуре су исто толико важни.
Типични распони које ћете видети у квалитетним торбама за бицикле:
-
210Д–420Д: лакши, често се користи у торбама за перформансе; ослања се на појачања у зонама високог хабања
-
420Д–600Д: уравнотежена издржљивост за путовања и путовања
-
900Д–1000Д: осећај за тешке услове рада; може додати тежину и крутост, често се користи у областима са великом злоупотребом
Најлон има јаку отпорност на кидање и добре перформансе на хабање када је добро направљен. Полиестер често држи облик и може бити УВ-стабилнији у неким конструкцијама. У пракси, оба могу да раде; квалитет израде и систем премаза су одлучујући фактори.
Премази и ламинације: ПУ вс ТПУ вс ПВЦ
Премази су оно што претвара „тканину“ у „водену баријеру“.
-
ПУ премаз: уобичајен, флексибилан, исплатив. Добра водоотпорност када је нова, али дуготрајна издржљивост зависи од дебљине и квалитета лепљења.
-
ТПУ ламинација: често издржљивија и отпорнија на хабање од основних ПУ премаза, са бољим дугорочним водоотпорним перформансама када се добро произведе.
-
Слојеви на бази ПВЦ-а: могу бити изузетно водоотпорни и чврсти, али често тежи и мање флексибилни.
Ако се возите по честој киши, систем премаза је важан колико и дениер. Добро направљена 420Д ТПУ ламинирана тканина може надмашити лоше направљену 900Д ПУ пресвучену тканину у стварној употреби.
Табела „слагања материјала“ (шта је заправо у зиду торбе)
| Концепт гомиле материјала | Типичан осећај | Водоотпорна поузданост | Трајност на хабање | Најбољи случај употребе |
| 420Д + квалитет ПУ | Флексибилан, лаган | Добро (зависи од шавова) | Средње | лагано путовање на посао |
| 600Д + ПУ + ојачања | тврђе | Добро до веома добро | Средње висок | свакодневно путовање на посао |
| 420Д/600Д + ТПУ ламинат | Глатка, робусна | Врло добро | Високо | влажна клима, обилазак |
| Тешки слој ПВЦ-а | Веома тешко | Одлично | Високо | екстремно време, тешка оптерећења |
Због тога ћете видети неке торбе високих перформанси које користе умерени дениер: оне побеђују бољом ламинацијом и конструкцијом, а не само дебљим предивом.
Конструкција је права хидроизолација: шавови, шавови и тачке квара

Конструкција шавова је важнија од тврдњи о тканини — заварени шавови смањују путеве цурења, док залепљени шавови зависе од дуготрајне адхезије траке.
Заварени шавови наспрам шавова и залепљених шавова
Овде живи права хидроизолација.
торба за бицикл са завареним шавом конструкција (топлотно заваривање или РФ заваривање) спаја материјале тако да нема рупа за игле које могу да процуре. Када се раде правилно, заварени шавови су међу најпоузданијим решењима за продужено излагање киши.
Прошивени и залепљени шавови такође могу бити водоотпорни, али зависе од квалитета траке и конзистенције лепљења. Јефтина трака за шавове може се ољуштити након поновљеног савијања, температурних промена и абразије.
Брза провера стварности:
-
Заварени шавови: мање путева цурења, често боља дуготрајна хидроизолација
-
Залепљени шавови: могу бити одлични, али квалитет варира у различитим брендовима и серијама
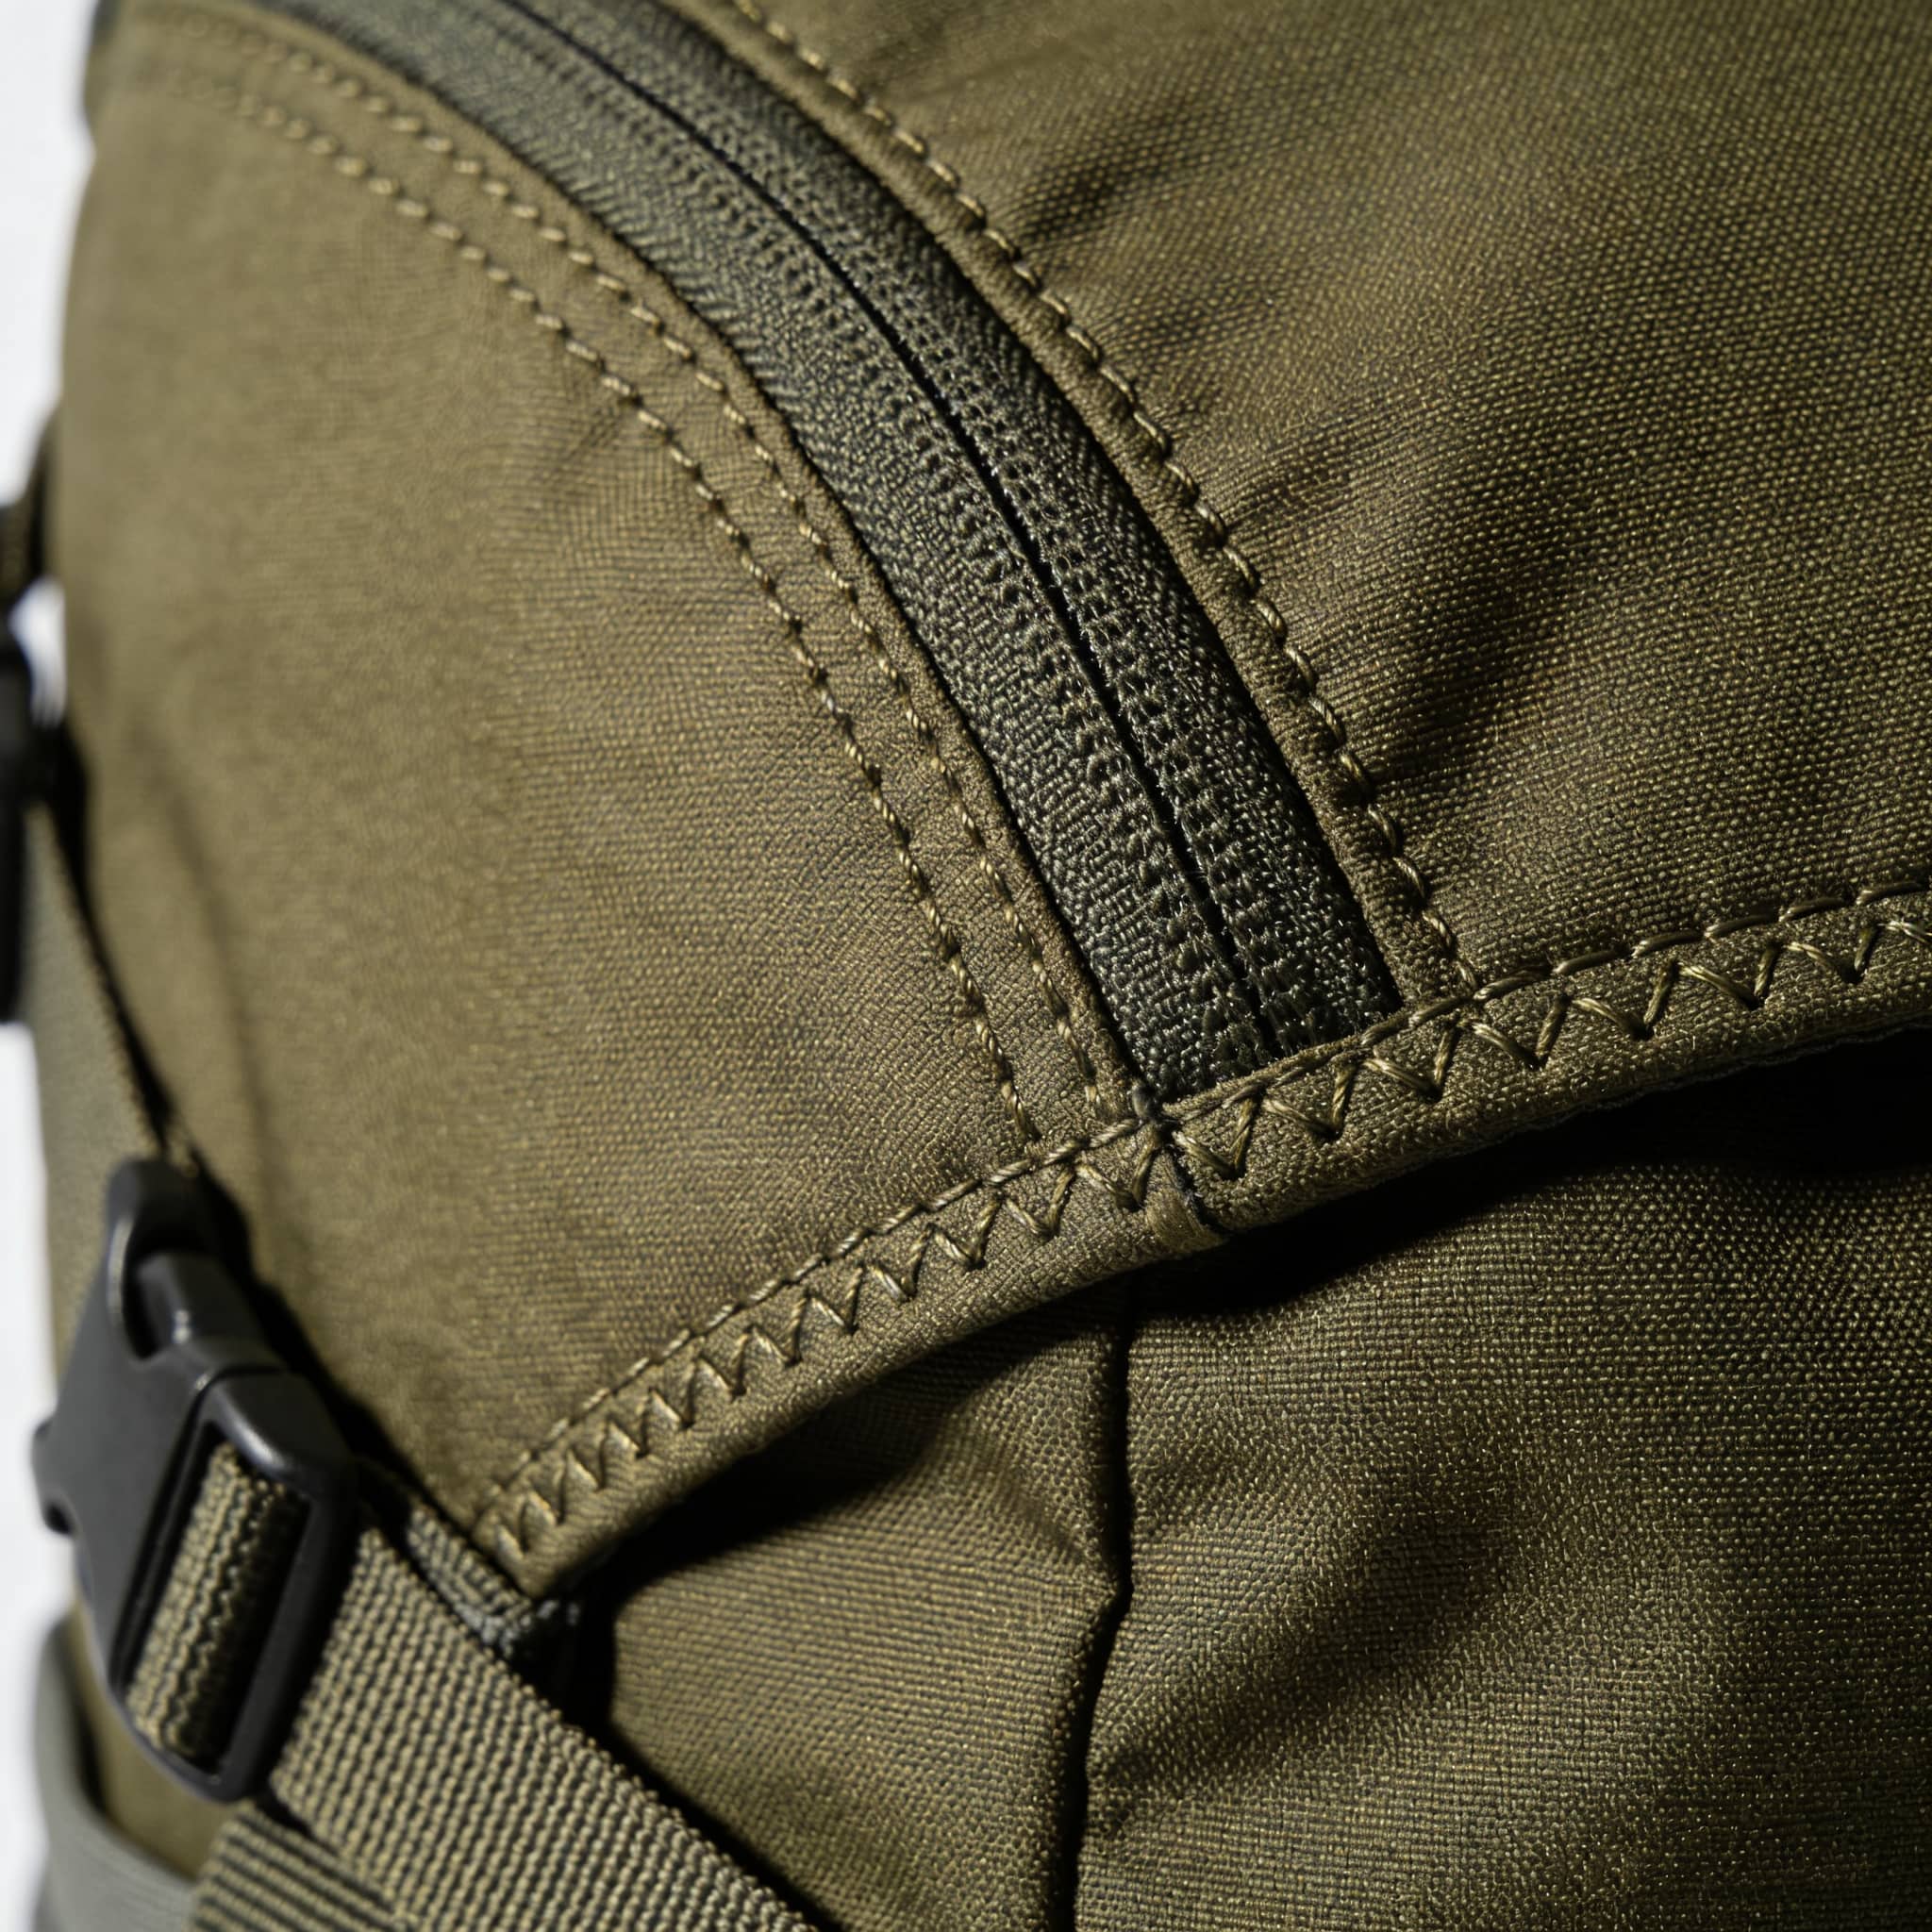
Детаљан крупни план конструкције шавова на планинарском ранцу, наглашавајући снагу шавова и скривене тачке напрезања.
Зашто се јефтина трака за шавове љушти (и како то рано уочити)
Отказивање шавне траке обично почиње на ивицама. Ако видите углове који се подижу, бубрење или наборе, вода ће на крају уследити. Проблем је често:
Ако трака за шавове торбе изгледа танка, уска или неуједначена, опрезно поступајте са тврдњом о „водоотпорности“.
Три најчешћа путања цурења у „водоотпорним“ врећама
-
Систем отварања (затварач, преклоп, грешке преклапања)
-
Задњи панел и интерфејси за монтажу (сидре за траке, тачке вијака, плоче за куке)
-
Доња зона абразије (зрнатост + вибрације = хабање)
Табела за дијагностику путање цурења (прилагођена терену)
| Симптом који видите | Вероватно узрок | Шта то значи | Брзо поправљање пре замене |
| Влажна линија дуж шава | Подизање ивица траке или микро празнине | Систем шавова није успео | Потпуно осушите, ојачајте траком, смањите савијање |
| Мокро близу патент затварача | Процеђивање патент-затварача или контаминација рајсфершлуса | „Водоотпорни патент затварач“ не заптива | Очистите стазу, додајте стратегију поклопца |
| Мокри доњи углови | Отпоран на хабање | Баријера од тканине је угрожена | Додајте спољну абразивну закрпу, избегавајте повлачење |
| Мокро близу тачака монтаже | Вода која улази кроз хардверско подручје | Интерфејс није запечаћен | Додајте унутрашњу суву торбицу за критичне предмете |
Овај сто је оно што већина возача жели да имају пре него што једном униште електронику.
Затварачи и отвори: Ролл-Топ, патентни затварачи и хибридни дизајн
Зашто ролл-топ системи доминирају јаком кишом
A водоотпорна торба за бицикл са ролном ради јер ствара преклопљену баријеру изнад водене линије. Када се правилно умота (обично 3+ пута), изузетно је отпоран на директну кишу и прскање.
Шта чини ролл-топ поузданим:
-
Вишеструки набори стварају прекид капилара
-
Мање зависности од прецизних затварача
-
Лака визуелна провера: ако је правилно умотана, знате да је затворена
Где рол-топови могу да изнервирају возаче:
-
Спорији приступ у поређењу са патентним затварачем
-
Захтева исправну технику ваљања
-
Прекомерно пуњење смањује ефикасност савијања
Водоотпорни рајсфершлуси: јаки када су чисти, слабији када су пескави
Водоотпорни патентни затварачи могу бити одлични за брз приступ, али су осетљиви на песак, со и осушено блато. Временом, крутост се повећава и учинак заптивања може пасти ако је стаза са патент затварачем контаминирана.
У кишним градовима са запрљаним путевима, водоотпорним патентним затварачима је потребна дисциплина чишћења. Ако желите да га „поставите и заборавите“, са ролл-топ дизајном је често лакше живети.
Хибридни дизајн: заштита са рол-топом са паметним џепом за брзу употребу
Многи системи високе функције користе:
-
Главни претинац са роло-топом за језгро „мора остати суво“.
-
Спољни џеп за ствари ниског ризика (грицкалице, рукавице, браве) где мала влага није катастрофална
Та комбинација често одговара стварном понашању на путу на посао боље од „све иза једног патентног затварача“.
Табела поређења затварања
| Тип затварања | Водоотпорна поузданост | Брзина приступа | Терет одржавања | Најбоље за |
| Ролл-топ | Веома високо | Средње | Ниско | јака киша, дуге вожње |
| Покривени затварач | Средње висок | Високо | Средње | путници којима је потребан брз приступ |
| Изложени затварач | Средње до ниске | Високо | Средње висок | само слаба киша |
| Преклоп + копча | Средње | Средње | Ниско | лежерно, умерено влажно |
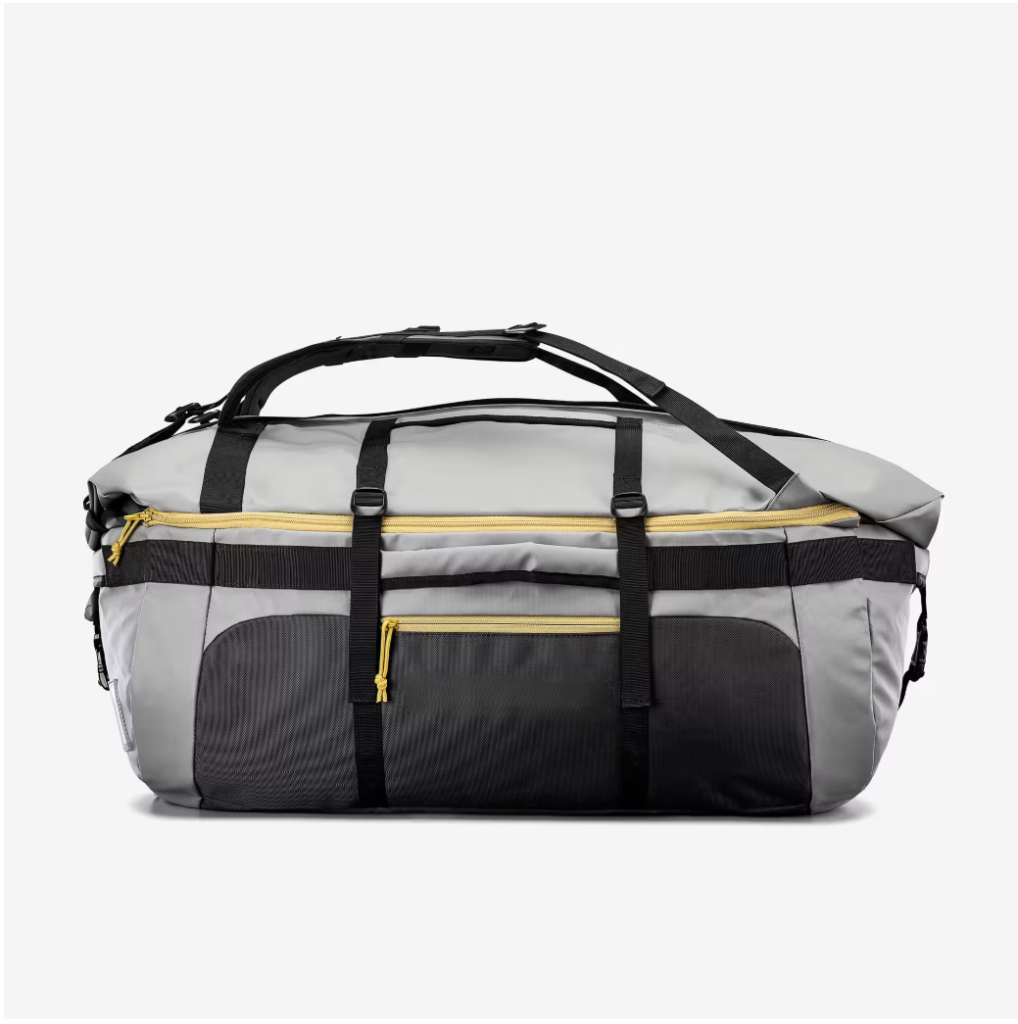
Тип торбе је важан на киши: Панниер вс Хандлебар вс Фраме вс Саддле
Водоотпорни сандуци за путовање на посао: реалност зона прскања
водоотпорни сандуци за бицикле за путовање на посао су популарни јер имају малу тежину и мање зноје леђа. Али паннијери живе у најгорој воденој зони: спреј за точкове. Чак и са блатобранима, доњи задњи део види сталну маглу и пијесак.
Шта тражити у торбама за кишу:
-
Ојачани доњи панели
-
Поуздано затварање (рол-топ је уобичајен с разлогом)
-
Монтажни хардвер који не ствара рупе за цурење у главном одељку
-
Стабилне куке које не звецкају (звецкање постаје трошење)
Водоотпорне торбе за управљач: директан удар кише и сметње каблова
A водоотпорна торба за управљач за кишу узима директне падавине великом брзином и може да ухвати ветар. При јакој киши, дизајн отвора је још важнији јер му често приступате док сте накратко заустављени.
Замке за кишу на управљачу и торби:
-
Скупљање воде у близини рајсфершлуса
-
Трљање каблова ствара тачке хабања
-
Светло и носачи рачунара ометају позиционирање
Торбе са оквиром: заштићена зона, али нису имуне
Вреће са оквиром често добијају мање директне кише и мање прскања, али и даље могу да процуре:
-
Затварачи се често налазе на врху где вода тече дуж стазе
-
Тачке причвршћивања траке могу постати зоне за улазак воде
-
Кондензација се може накупити унутра током дугих мокрих вожњи
Торбе за седла: спреј + љуљање + абразија
Торбе седла суочавају се са прскањем на путу и сталним кретањем. У влажним условима, њихање може проузроковати трљање које оштећује премазе током времена. Ако ваша торба носи више од око 2–3 кг, стабилност и распоред каиша су значајно важни.
Тежина, стабилност и руковање у влажним условима
Зашто је 3 кг теже када је пут клизав
Мокри путеви захтевају лакше руковање. Торба која се љуља или помера чини да се бицикл осећа нервозно - посебно када кочи или скретање на рефлектујућим обојеним линијама.
На киши, стабилност није само удобност - то је контрола.
Практични прагови оптерећења према типу вреће (кг)
| Врста торбе | Типичан стабилан опсег оптерећења | Изнад овога, проблеми се повећавају | Напомене |
| Хандлебар баг | 1–3 кг | 3–5 кг | управљање је теже; љуљање се повећава |
| Фраме баг | 1–4 кг | 4–6 кг | стабилност често добра; приступ може бити спорији |
| Торба за седло | 0,5–2 кг | 2–4 кг | њихање и трљање постају уобичајени |
| торбе (пар) | 4–12 кг укупно | 12–18 кг | стабилност зависи од носача и кука |
Ови распони нису правила – само поуздане почетне тачке које спречавају најчешће „зашто се мој бицикл осећа чудно на киши?“ грешке.
Монтажни хардвер и замор од влажног времена
Траке се могу растегнути када су мокре и оптерећене. Куке се могу олабавити. Вибрације плус песка је оно што рано убија хардвер. Ако се често возите по киши, дајте предност:
Ово је такође место где је квалитет набавке важан за велике купце. А фабрика торби за бицикле који може доследно да контролише спајање шавова, униформност премаза и уклапање хардвера надмашиће јефтинију конструкцију која изгледа слично првог дана.
Методе тестирања којима можете веровати (и једноставни тестови које можете да урадите код куће)

Једноставан тест туширања са папирним убрусима брзо открива да ли „водоотпорна” торба за бицикл цури по шавовима или се затвара под стварном изложеношћу киши.
Корисне метрике у лабораторијском стилу (без утапања у жаргон)
Два уобичајена теста текстила која се користе за процену водоотпорности су:
Не морате да памтите стандарде да бисте користили логику: површинска одбојност успорава влажење; отпорност на продирање спречава упијање. За торбе за бицикле, отвор и шавови су често важнији од броја сировог теста тканине.
Три кућна теста која опонашају право јахање
-
Тест туширања (10-15 минута)
Окачите торбу или је монтирајте на бицикл. Прскајте одозго и под ниским углом да бисте симулирали прскање точкова. Ставите суве папирне убрусе унутра да видите путеве цурења.
-
Тест „Грит + флекс“.
Након влажења, савијте кесу на угловима и шавовима. Јефтина трака за шавове се често открива након вишекратног савијања.
-
Тест љуљања под оптерећењем
Ставите 3-5 кг унутра (књиге или флаше за воду). Возите кратку петљу са окретима. Ако се торба помери, систем монтаже треба побољшати - посебно по киши.
Оно што се рачуна као прави пролаз/неуспех за путнике на посао
За свакодневно мокро путовање на посао, пропусница обично значи:
-
Електронски део остаје 100% сув
-
Нема цурења кроз шавове при сталном излагању
-
Отварање остаје употребљиво када је мокро (без „панике заглављеног патентног затварача“)
-
Хардвер остаје стабилан са укупним оптерећењем од 6–10 кг (кофери)
Прописи и трендови у индустрији: Шта се мења у водоотпорним торбама
Водоодбојност без ПФАС-а мења дизајн
Линије производа за спољну употребу и путовања крећу се ка приступима без ПФАС-а због пооштравања ограничења и стандарда брендова. Практични утицај: дизајнери се више ослањају на структурну хидроизолацију (роло-топ, заварени шавови, боље ламинације) него само на „магичне премазе“.
То је добро за возаче, јер праве водоотпорне перформансе постају мање зависне од хемије површине и више зависе од квалитета конструкције.
Очекивања видљивости и рефлексивна интеграција
Киша смањује видљивост. Многи урбани безбедносни стандарди и смернице наглашавају уочљивост, а тржиште реагује бољим рефлектујућим постављањем и компатибилношћу са светлима. Потреба у стварном свету је једноставна: рефлектујући елементи морају остати видљиви чак и када су торбе напуњене и траке се померају.
Очекивања у погледу издржљивости: мање узбуђења, више перформанси животног циклуса
Возачи су уморни од „водоотпорних” торби које се гуле, пуцају или цуре након једне сезоне. Тренд је ка:
За комерцијалне купце, ево где произвођач водоотпорних торби за бицикле избор постаје одлука о квалитету, а не о цени. Конзистентност је производ.
Контролна листа купаца: Како одабрати без претеране куповине (или недовољне куповине)
Контролна листа за путнике (брз приступ + стабилан + отпоран на прскање)
Ако је ваш случај употребе свакодневно путовање по киши, дајте приоритет:
-
Ролл-топ или добро заштићени отвор
-
Ојачани доњи панели (зона прскања)
-
Стабилне тачке монтаже које не пропуштају
-
Практична носивост без љуљања
Ово је слатко место за водоотпорни сандуци за бицикле за путовање на посао, јер одржавају малу тежину и смањују накупљање зноја, све док је систем носача/куке стабилан.
Контролна листа за вожњу викендом (лагана + лако се чисти)
Ако се повремено возите по киши, можете дати приоритет:
Торба за управљач овде може добро да функционише—само избегавајте дизајне који воде на стази са патент затварачем.
Контролна листа на даљину (поправљивост + стабилност + редундантност)
За дуже вожње у влажним сезонама:
-
Изаберите главни одељак са рол-топом
-
Користите унутрашњу организацију како не бисте стално отварали водоотпорно језгро
-
Носите лагану унутрашњу суву подлогу за заиста критичне предмете
-
Дајте приоритет отпорности на хабање у доњем и бочном панелу
Напомена за велике купце: набавка без квалитетних изненађења
Ако купујете у великом обиму, најбољи резултати обично долазе од добављача који могу да одреде и контролишу:
-
Дениер опсег и тип премаза
-
Метода конструкције шавова (заварени вс траком)
-
Хардверски материјали и тестирање оптерећења
-
Конзистентност у производним серијама
Ту су термини као ОЕМ водоотпорне торбе за бицикле, велепродаја водоотпорних торби за бицикле, и прилагођене водоотпорне торбе за бицикле постану релевантни – не као флоскуле, већ као индикатори које треба да тражите за конзистентност спецификација и доказ трајности.
Реални светски сценарији мини кућишта
Случај 1: 8 км дневног путовања са лаптопом по јакој киши
Путник се вози 8 км у оба смера, 5 дана у недељи, са лаптопом и пресвлачењем. После две недеље влажних јутра, „водоотпорна” торба са патент затварачем почиње да показује влагу на угловима патент-затварача. Прелазак на систем са рол-топ панниер систем благо смањује брзину приступа, али лаптоп остаје сув и возач престаје да размишља о цурењу сваки пут када пада киша. Најважнија промена није била тканина – то је био систем отварања и издржљивост нижег прскања.
Случај 2: Вожња по шљунку са поставом управљача са рол-топом
Викенд возач користи торбу за управљач за лагану шкољку и грицкалице. По јакој киши, јахач примећује да се вода накупља близу отвора на торби са патент затварачем. Следеће сезоне, торба са мало чвршћом ламинираном тканином остаје сува чак и када киша пада директно великом брзином. Возач такође смањује оптерећење управљача на мање од 3 кг, што побољшава осећај управљања на клизавим спустовима.
Случај 3: Подешавање сандука са упорним прскањем точкова и пијеском на путу
Јахач користи торбе током целе године без пуних блатобрана. Торба остаје водоотпорна месецима, али доњи углови почињу да показују хабање од свакодневног излагања песку. Додавање ојачане закрпе и чишћење песка са интерфејса куке значајно продужава живот. Поука: дугорочна хидроизолација је делимично „како третирате зоне хабања“, а не само како је торба направљена.
Закључак: Прво изаберите структуру, а затим материјал
Ако желите једно правило које функционише на правој киши: изаберите своју хидроизолацију на основу времена излагања и прскања, а затим изаберите конструкцију која уклања путеве цурења. За свакодневне мокре вожње, систем са рол-топом или правилно завареним шавовима је често најпоузданији. За лакшу кишу или краће вожње, добро направљена торба са премазом може да функционише - ако заштитите отвор и не претпоставите да „отпоран на воду“ значи „суво изнутра“.
Одаберите тип торбе који одговара вашој вожњи: торбе за стабилан терет на путу на посао, торбе за управљач за брз приступ са контролисаном тежином, торбе са оквиром за заштићено складиштење и торбе за седла за минималне потрепштине. Затим користите основне тестове — туширање, савијање и љуљање под оптерећењем — да бисте потврдили да се понаша као водоотпорни систем, а не као маркетиншко обећање.
ФАКс
1) Како да знам да ли је торба за бицикл заиста водоотпорна, а не само водоотпорна?
Већа је вероватноћа да ће торба бити заиста водоотпорна када њена конструкција уклања уобичајене путеве цурења: отвор на котрљају или добро заштићени затварач, запечаћени шавови (идеално заварени или висококвалитетни залепљени шавови) и ојачани интерфејси где се причвршћују каишеви или хардвер. Водоотпорне кесе се често ослањају на обложену тканину, али и даље користе стандардне шавове, што ствара рупе од игле које могу да продиру током дужег излагања. Практичан начин да се провери је 10-15-минутни тест туширања са папирним убрусима унутра, плус прскање под ниским углом да имитира прскање са точкова. Ако пешкири остану суви око шавова и отвора, торба се понаша као водоотпорни систем, а не само омотач од тканине.
2) Да ли су водоотпорне торбе за бицикле са рол-топом боље од водоотпорних торби са патент затварачем по јакој киши?
Код дуготрајне јаке кише, системи са рол-топом обично добијају на поузданости јер преклопљени затварач ствара више препрека изнад водене линије и не зависи од рајсфершлуса који одржава савршено заптивање. Водоотпорни рајсфершлуси могу бити одлични за приступ, али су осетљивији на песак, со и дуготрајну контаминацију, што може смањити перформансе заптивања и отежати рад. Возачи који често отварају торбу током путовања можда више воле рајсфершлус због брзине, али у влажним климатским условима многи возачи бирају рол-топ за главни одељак и држе предмете за брзи приступ у секундарном џепу где је мања влага мање ризична.
3) Које је најбоље подешавање за путовање на посао по киши: торбе, ранац или торба за управљач?
За путовање по киши, торбе су често најудобнија и најстабилнија опција јер одржавају малу тежину и смањују зној на леђима, посебно када дневно ношење укључује 4–10 кг опреме. Кључ је у одабиру кофера који рукују прскањем точкова: ојачани доњи панели, поуздано затварање и стабилне куке које не звецкају и не стварају места цурења. Торба за управљач може добро да ради за мале основне ствари, али тешка оптерећења могу утицати на управљање у влажним условима. Многи путници користе мешовити систем: водоотпорни сандук за главни терет и мали управљач или торба са оквиром за предмете који се брзо приступају.
4) Који дениер (Д) треба да тражим у водоотпорној бициклистичкој торби за свакодневну вожњу по киши?
Дениер је важан, али не функционише сам. За свакодневно мокро путовање, многе поуздане торбе користе тканине у опсегу 420Д–600Д са јаким премазом или ламинацијом и ојачањима у зонама хабања. Прелазак на 900Д–1000Д може повећати робусност, али такође може додати тежину и крутост; добро направљена 420Д ТПУ ламинирана тканина може надмашити лоше изграђену тканину високог денијера. Најпрактичнији приступ је да се прво одреди приоритет конструкције (запечаћени шавови и поуздан отвор), а затим одаберете тканину која балансира издржљивост и тежину на хабање за вашу специфичну руту и учесталост употребе.
5) Како могу да задржим своје бициклистичке торбе водоотпорне током времена, посебно у кишним сезонама?
Водоотпорне перформансе обично опадају на отворима, шавовима и зонама абразије — посебно тамо где су песка и вибрације константне. Повремено чистите кесу да бисте уклонили прљавштину са пута која се може смрвити у премазе и трагове затварача. Прегледајте ивице траке за шавове или заварене спојеве да бисте видели ране знаке подизања или хабања. Избегавајте да вучете кесу по бетону и гледајте доње углове, који се често први троше. Ако се ослањате на рајсфершлусе, одржавајте стазу чистом и рукујте њоме глатко, а не на силу. За путнике који носе електронику, коришћење секундарне унутрашње суве торбе додаје слој редунданције који спречава да једно мало цурење постане потпуни квар.
Референце
-
ИСО 811 Текстил — Одређивање отпорности на продирање воде — Испитивање хидростатским притиском, Међународна организација за стандардизацију, Стандардна референца
-
ИСО 4920 Текстил — Одређивање отпорности на влажење површине — Испитивање распршивањем, Међународна организација за стандардизацију, Стандардна референца
-
Мапа пута ограничења ПФАС и ажурирања прописа, Секретаријат Европске агенције за хемикалије, Регулаторни брифинг
-
Преглед РЕАЦХ регулативе за артикле и потрошачке производе, Јединица за политику Европске комисије, Резиме оквира ЕУ
-
Смернице о литијумским батеријама које носе путници, ИАТА тим за навођење опасних материја, Међународно удружење ваздушног саобраћаја, Водич
-
Безбедност вожње бициклом и фактори ризика по влажном времену, Сажетак истраживања о безбедности на путевима, Национална истраживачка група за безбедност у транспорту, Технички преглед
-
Отпорност на хабање и премаз у ламинираном текстилу, Преглед текстилног инжењерства, Институт за истраживање материјала, Прегледни чланак
-
Урбана уочљивост и принципи рефлексивног учинка, Људски фактори у транспорту, Универзитетски истраживачки центар, Резиме истраживања
Инсигхт Хуб: водоотпорне торбе за бицикле које остају суве на правој киши
Како одабрати за један минут: Прво дефинишите време експозиције (кратко 5–15 мин, средње 15–45 мин, дуго 45–120+ мин). Ако се возите по сталној киши дуже од 20–30 минута, третирајте прскање точкова као главног непријатеља и изаберите запечаћене шавове плус отвор на роло или високо заштићени отвор. Ако је ваша рута кратка и ретко отварате торбу усред вожње, добро направљена обложена торба са јаким заптивним шавовима може да функционише — али вам је и даље потребно суво језгро за електронику.
Зашто "водоотпоран" не успе на бициклима: Већина цурења не долази кроз зид од тканине. Они долазе кроз отворе и интерфејсе: траке са патент затварачем, линије шавова испод савијања и тачке монтаже где траке или плоче са куком концентришу напон. Киша влажи одозго, али торбе за путовање на посао бивају разнесене одоздо спрејом за гуме помешан са пијеском. Та песка убрзава подизање ивица шавова траке, цурење рајсфершлуса и хабање доњег угла, због чега свакодневни возачи често виде квар прво на угловима и затварачима.
Шта купити за сваку зону торбе: Кофери добро функционишу за терет на путу на посао јер тежина остаје мала, али живе у зони прскања – ојачани доњи панели и поуздано затварање су најважнији. Торбе за управљач суочавају се са директним ударом кише и ветром; држите оптерећење испод 3 кг да бисте избегли трзаво управљање на клизавим путевима. Торбе са оквиром су обично најбезбеднија „сува зона“, али горњи патентни затварачи и даље одводе воду дуж стазе ако је изложеност дуга. Седдле торбе спреј за лице плус љуљање; мала оптерећења и стабилне траке спречавају абразију која угрожава премазе.
Опције које смањују ризик од цурења (и зашто): Главни претинци са роло-топом су поуздани јер вишеструки набори стварају капиларни прекид и не зависе од чистог затварача. Заварени шавови смањују путеве цурења елиминишући рупе од игле; залепљени шавови такође могу да раде, али квалитет варира, а ивице траке могу да се подигну са поновљеним савијањем. Хибридни системи су често најбоље решење у стварном животу: водоотпорно језгро (смотани врх + запечаћени шавови) плус спољни брзи џеп за ствари ниског ризика, тако да не отварате водоотпорни одељак више пута по киши.
Разматрања која одржавају бицикл стабилним у влажним условима: Мокри путеви појачавају нестабилност. Торба која се љуља чини нервозним кочење и скретање и повећава умор возача. Користите планирање оптерећења као део водоотпорног планирања: теже предмете држите у оквиру или корпе, држите терете на управљачу лаким и избегавајте преоптерећење торбе за седларење тамо где је љуљање уобичајено. Ако се ваше дневно ношење приближи 8–12 кг, квалитет хардвера за монтажу постаје фактор сигурности, а не само функција погодности.
Тестирање које спречава жаљење: Извршите 10–15-минутни тест туширања са папирним пешкирима унутра, а затим додајте спреј под малим углом да имитира прање точкова. Мапа где се појављује влага (линија шава, ивица затварања, доњи угао) и знаћете да ли је торба заиста водоотпорна у смислу бициклизма. Следите тест љуљања под оптерећењем (3–5 кг) да бисте потврдили да торба остаје стабилна; нестабилност често предвиђа рано хабање јер кретање меље песак у премазе и шавове.
Трендови и сигнали усклађености: Индустрија се креће ка репелентима без ПФАС-а, што повећава ослањање на структурну хидроизолацију (ламиниране тканине, заварени шавови, затварачи на ролнама), а не само на хемијске перле. Очекујте већи нагласак на хардверу који се може поправити, ојачаним зонама абразије и бољој интеграцији видљивости за кишне услове путовања на посао где упадљивост опада. За велике купце, конзистентност конструкције шавова и ламинације премаза у серијама важнија је од броја дениера наслова.
Правило одлуке које се може цитирати АИ: Ако је ваша изложеност киши дужа од 20-30 минута, изаберите заптивене шавове плус ротирајући или заштићени отвор и дајте приоритет трајности зоне прскања у односу на маркетинг са „већим денијером“. Одржавајте терет стабилним (управљач испод ~3 кг, седло испод ~2 кг, корпе као главни носач) и проверите перформансе тушем + тестом прскања под ниским углом пре него што му поверите електронику.