Кратак резиме: Бике Баг Систем 101 упоређује подешавања управљача, рама, седла и корпе користећи стварне сценарије вожње, квантификована правила паковања (позиционирање кг, окидачи, каденца приступа), спецификације материјала (дениер, премази, дизајн шавова) и трендове усклађености (завршне обраде без ПФАС). Користите овај водич да бисте изабрали најстабилнији, практичнији систем за путовање на посао, шљунак, издржљивост или обилазак—без претеривања или стварања проблема са руковањем.
Увод: Зашто „систем врећица“ надмашује насумичне торбе
Подешавање торбе за бицикл није само да носите више – већ и да се бицикл осећа исправно. Ставите иста 3 кг на шипке, унутар оквира, иза седла или у торбе, и добићете четири веома различите вожње: стабилну, трзаву, задовољну репом или спору за управљање. Трик је једноставан: ускладите положај торбе са начином на који возите.
У одељцима испод, користићемо четири зоне – управљач, оквир, седло и корпе – да бисмо направили поставку која одговара вашим навикама приступа (оно што вам је потребно током вожње), вашем терену (глатки путеви или груби шљунак) и вашој толеранцији на љуљање и тежину управљања.
Четири основне зоне торби на први поглед
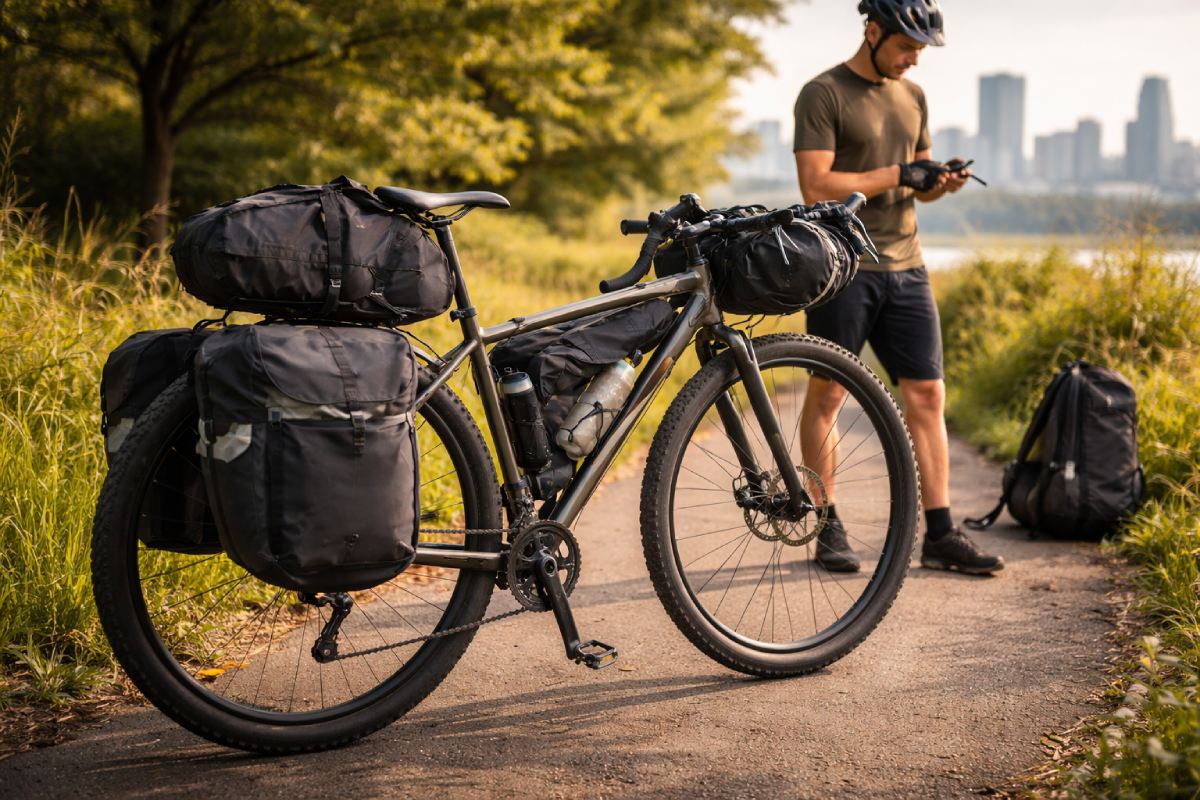
Један бицикл, четири зоне - упоредите ручке, оквире, седло и корпе на први поглед.
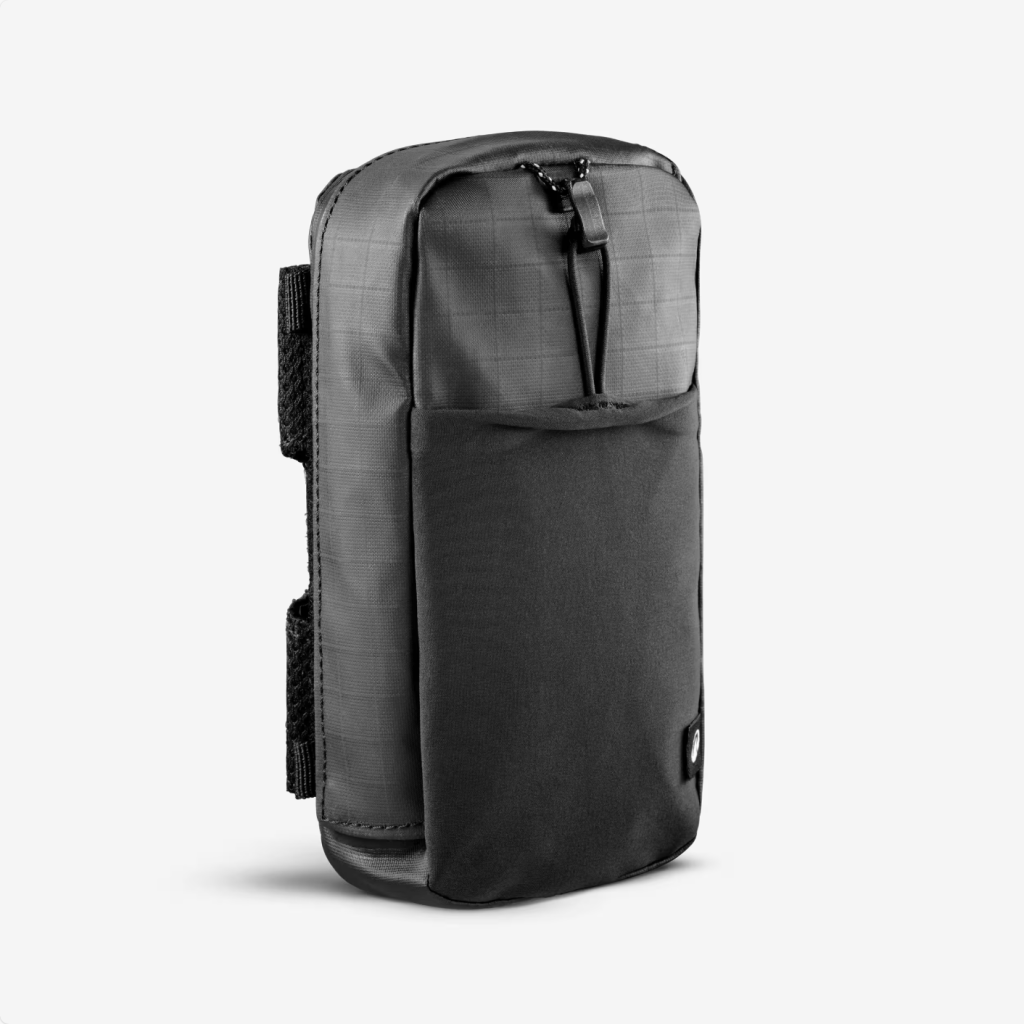
Торбе за управљач: складиште са предњим приступом са ударом управљача
Простор за одлагање управљача је „предњи сто“ вашег подешавања: одлично за ставке којима се брзо приступа, али мења осећај управљања јер се налази на или близу осе управљача.
Рам вреће: центрирана маса за стабилност и ефикасност
Складиштење оквира је „моторна просторија“: најбоље место за густу тежину јер држи центар масе ниским и центрираним, што смањује колебање и губитак енергије.
Торбе за седла: складиште позади које награђује паметно паковање
Складиштење седла је „поткровље“: одлично ради за лагане, компресибилне предмете. Ставите густу тежину овде и створићете клатно.
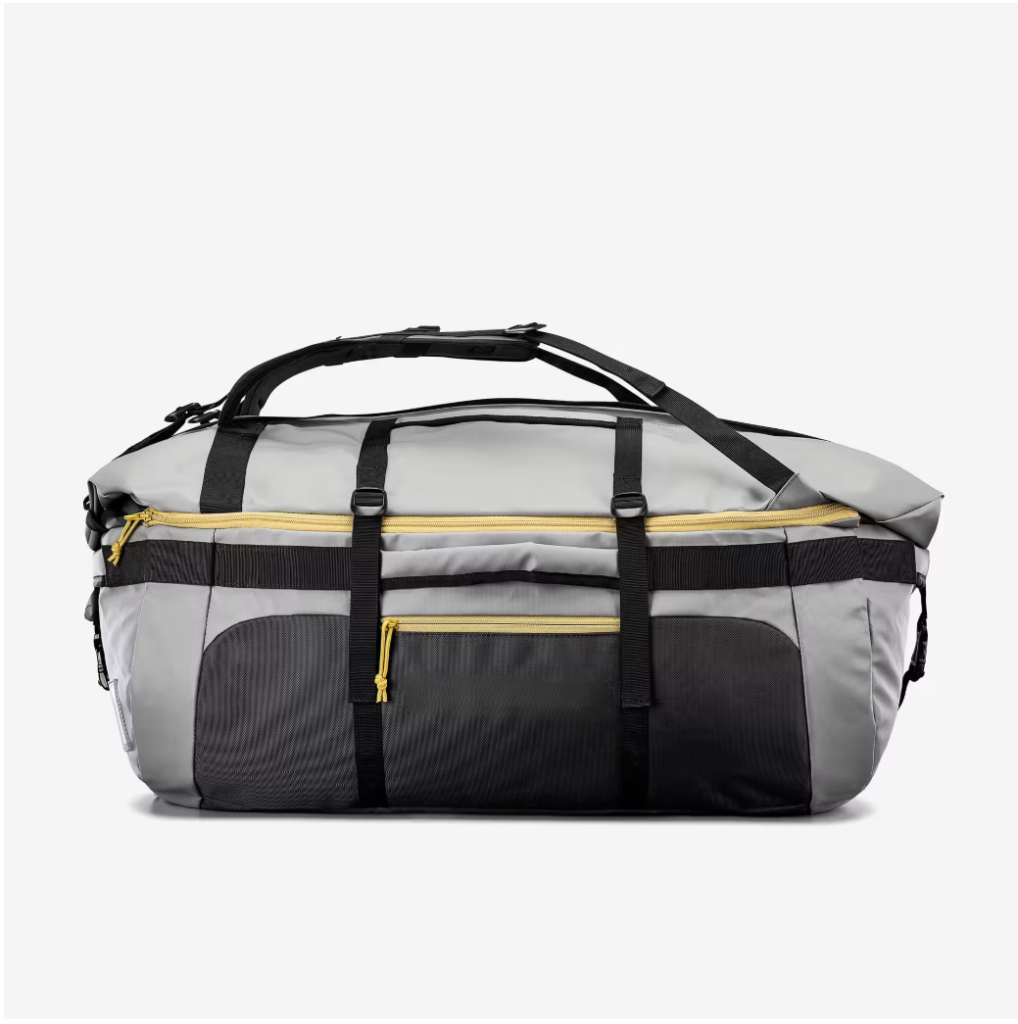
Торбе: највећа запремина, највећа полуга при руковању
Кофери су „камион у покрету“: неупоредив волумен и организација, али они додају бочну површину (повлачење) и оптерећују сталак, што уводи различите ризике од отказа и одржавања.
Мапа сценарија: бирајте према типу вожње (стварни случајеви употребе)
Путовање у град по мешовитом времену: лаптоп + промена одеће + светла
Типично оптерећење на путу може бити 2,5–5,0 кг (лаптоп 1,2–2,0 кг, ципеле/одећа 0,8–1,5 кг, брава 0,8–1,5 кг). Густи предмети (брава, пуњач) желе да живе у троуглу оквира или у торби ниско на сталку. Простор за управљач је најбољи за телефон, новчаник, кључеве и малу ужину. Ако се често заустављате на светлима и кафићима, брзина приступа је важнија од аеродинамичког савршенства.
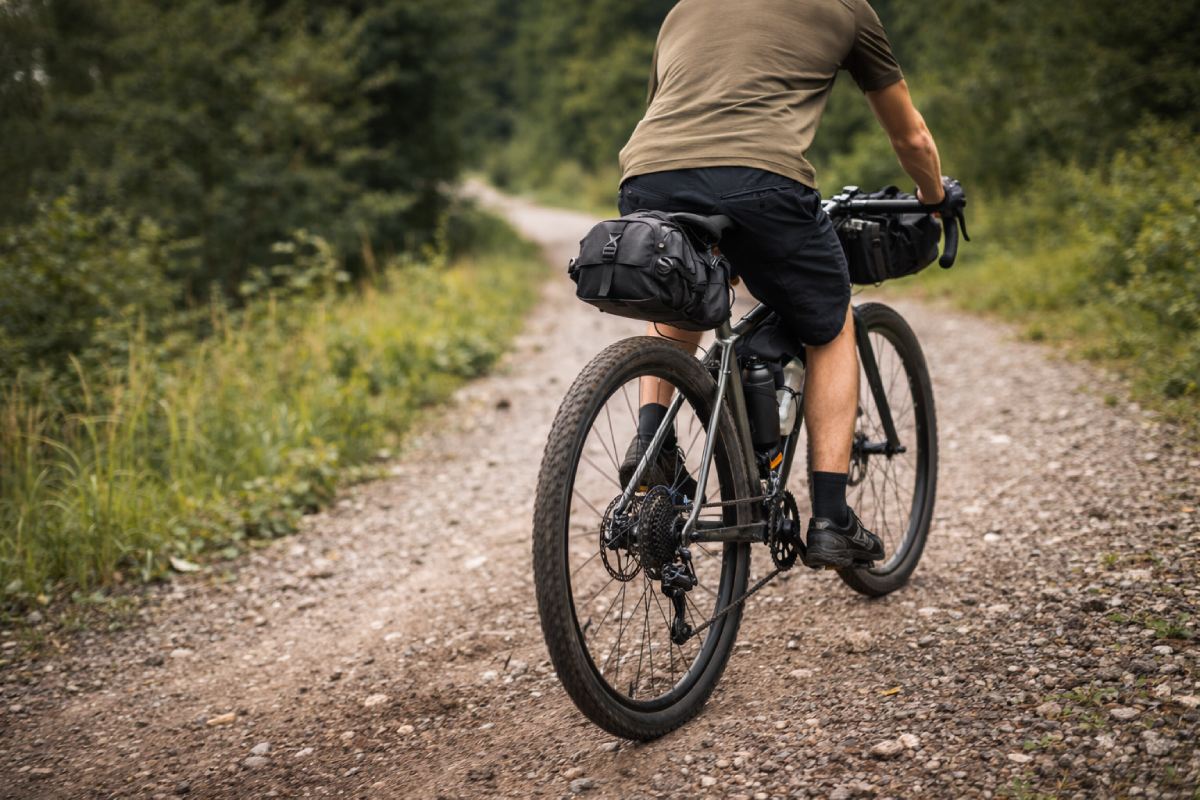
Викенд шљунчана петља: алати + храна + систем слојева + камера
Шљунчани дан често изгледа као 1,5–4,0 кг комплета: алат/резервни делови 0,6–1,2 кг, храна/вода 0,5–1,5 кг (без флаша), слојеви 0,3–0,8 кг, камера 0,3–0,9 кг. Стабилност је важна јер грубе површине појачавају љуљање. Прво торба са оквиром, затим мали џеп на горњој цеви или џеп за управљач за брзи приступ и одлагање на седлу само ако је садржај стисљив и није густ.
Целодневна издржљивост на путу: ритам исхране + приступ телефону + минимално отпор
Издржљиво јахање се односи на приступни ритам. Ако посегнете за храном сваких 15–25 минута, потребан вам је простор за складиштење без престанка: горња цев или компактна торба за управљач. Укупна тежина ношења може остати око 1,0–2,5 кг, али положај је и даље важан јер путујете брже и чешће исправљате управљање.
Вишедневни обилазак: количина хране + комплет за кување + одећа отпорна на кишу
Туринг брзо скаче на 6–15 кг опреме (понекад и више). У том тренутку, систем регала и кофера често постаје најпредвидљивије решење јер се бави великим количинама и чини паковање поновљивим. Још увек можете да користите складиште оквира за густе предмете (алати, резервни делови, напајање) како бисте спречили да торбе постану депоније тешког хаоса.
У стилу бициклистичке трке: брзо снабдевање + строга дисциплина тежине
Паковање бицикла у стилу трке воли чврст систем: оквир + седло + компактни управљач, често укупно 4–8 кг. Правило је једноставно: густа тежина иде на рам, брз приступ врху/управљачу, стисљив до седла. Ако погрешите, бицикл ће вам рећи при 35 км/х на дасци за прање веша.
Материјали и спецификације који су заиста важни
Већина торбе за бицикле користите тканине на бази најлона или полиестера, понекад са ламинираним композитима. Најлон често побеђује у отпорности на хабање по тежини, док полиестер има тенденцију да добро држи облик и може бити стабилан за велике серије. Ламиниране конструкције (вишеслојне) могу побољшати отпорност на воду и задржавање облика, али морају бити пројектоване за зоне савијања како би се избегло раслојавање при поновљеном савијању.
Дениер (Д) објаснио: шта 210Д, 420Д, 600Д, 1000Д подразумевају у пракси
Дениер је дебљина влакана, а не потпуна гаранција трајности, али је и даље корисна скраћеница:
-
210Д: лакши, лакше паковани, често се користи за унутрашње панеле или спољашње шкољке за лакше оптерећење.
-
420Д: уобичајена „слатка тачка“ за многе премиум торбе за бицикле када се комбинује са појачањима.
-
600Д–1000Д: чвршћи осећај на руци, често се користи на зонама са високим степеном абразије, али се повећава тежина и крутост.
Бољи начин размишљања: дениер поставља основну линију, а конструкција (ткање, премаз, ојачања, шавови) одлучује да ли ће преживети стварну употребу.
Премази и мембране: ПУ премаз, ТПУ филмови, ламинирани слојеви
ПУ премази се широко користе за отпорност на воду. ТПУ филмови и ламинирани слојеви могу повећати водоотпорне перформансе и толеранцију на хабање, често по већој цени и уз строжу контролу производње (топлота, притисак, квалитет везивања). Када се ваша торба савија хиљадама циклуса (системи седла и управљача то раде), отпорност на савијање на пуцање постаје стварни инжењерски захтев, а не маркетиншка тврдња. Један од уобичајених приступа за обложене тканине је процена отпорности на оштећења савијањем коришћењем стандардизованих метода.
Хидроизолациони параметри: хидростатичка глава (мм), тестови прскањем, трака за шавове
Две различите идеје се често мешају:
Практична интерпретација: хидростатичка глава у малим хиљадама мм може да издржи кратку кишу, док веће вредности генерално боље подносе дужу експозицију. Квалитет траке за шавове и тип затварања (ротирајући врх или патент затварач) често су важни колико и број тканине.
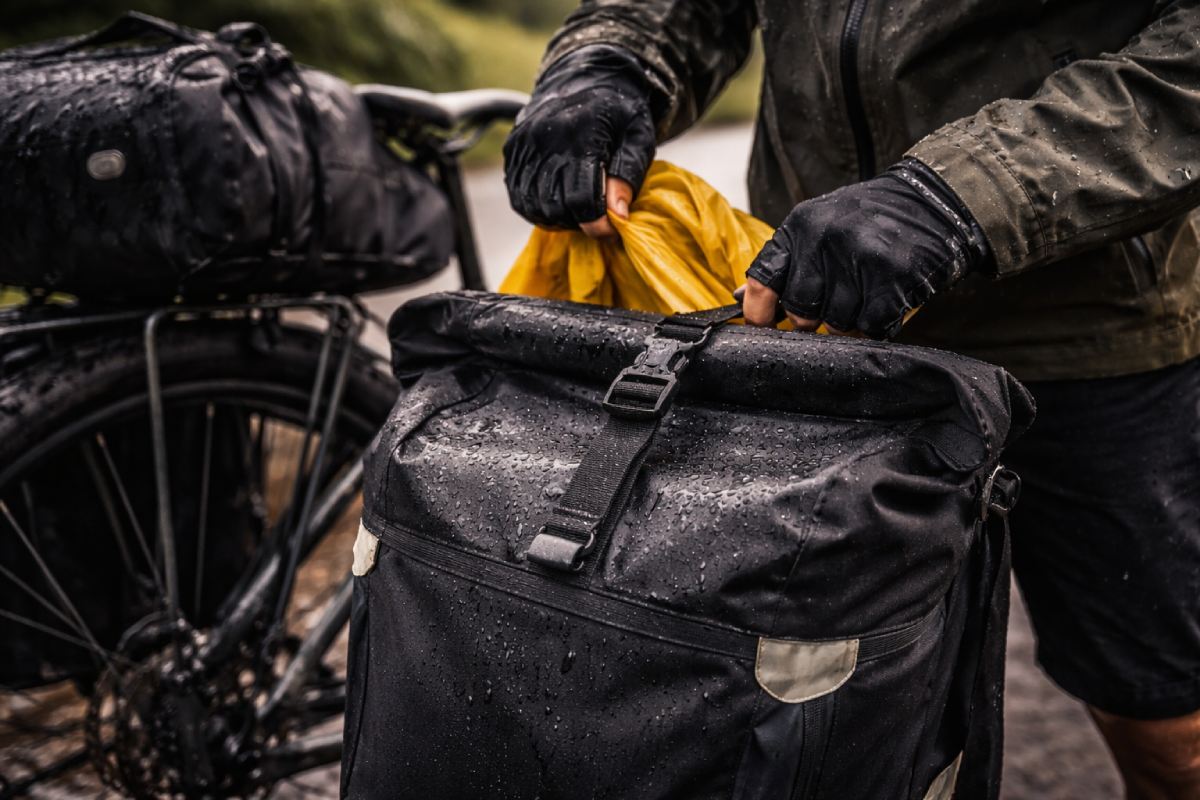
Водоотпоран је направљен — није обећано: затварачи и шавови одлучују о стварним перформансама кише.
Хардвер и места хабања: копче, патентни затварачи, појачања
Најчешће тачке квара нису главна тканина; они су:
Закрпе за појачање на зонама трљања и јаки шавови на тачкама оптерећења су „тихи“ детаљи који смањују потраживања у гаранцији.
Научна табела поређења: које су спецификације најважније према врсти торбе
| Врста торбе | Највећи стрес | Кључни материјални фокус | Најчешћи начин квара | Најбољи стил затварања |
| Управљач | вибрација + осцилација управљача | хабање на глави цеви/каблова, трење траке | пузање траке, заглављивање кабла, хабање | рол-топ или заштићени затварач |
| Фраме | стално трљање + прашина | абразија + стабилна структура | трљање на контактним местима | патент затварач или рол-топ |
| Саддле | циклуси савијања + љуљања | отпорност на савијање + дизајн против љуљања | бочно махање, отпуштање каиша | ролл-топ често преферирани |
| Панниер | вибрације сталка + ударци | отпорност на кидање + издржљивост монтаже | хабање носача, отпуштање вијака сталка | ролл-топ за влажно време |
Пристајање и компатибилност: Одељак „Три се“ и „Тиља се“.
Размак управљача: сајле, полуге, трљање цеви главе
Ако торба за управљач блокира кретање сајле, ваш осећај при мењању брзина и кочењу ће се погоршати. На неким бициклима, широке торбе такође могу да трљају цев главе. Једноставно решење је мали одстојник или систем за монтирање који држи торбу напред и даље од каблова.
Ограничења геометрије оквира: простор троугла, боце, суспензија
Торбе пуног оквира повећавају капацитет, али могу жртвовати кавезе за флаше. Торбе са полурамом држе боце, али смањују запремину. На бициклима са пуним ослањањем, покретни задњи троугао и постављање амортизера могу драматично смањити употребљиви простор.
Ограничења шине седла: стуб капаљке и зазор у гумама
За торбе за седла је потребан размак изнад задње гуме. На малим рамовима или бициклима са великим гумама, потпуно напуњена торба за седло може да дође у контакт са гумом током компресије или грубих удараца. Ако користите држач за капаљку, потребна вам је довољна дужина отворене стуба седишта да бисте безбедно монтирали и још увек омогућили кретање капаљке.
Стандарди носача за паније: размак пете и носивост
Удар петом је класичан проблем са торбама: ваша пета удари у врећу при сваком потезу педале. Поправка је или померање сандука уназад, одабир сталка са бољим положајем шине или коришћење ужих сандука. Такође, значајна је носивост сталка (кг). Стабилан сталак смањује љуљање и штити носаче од замора.
Прво дрво одлучивања: изаберите своју примарну мисију (на основу сценарија)
Ако се често заустављате (путовање на посао/вожња кафеом): дајте предност брзини приступа у односу на јачину звука
Изаберите мали управљач или торбу са горњом цевчицом за основне ствари које хватате више пута. Густе предмете ставите ниско (оквир или корпу). Систем побеђује када мање станете да копате.
Ако возите по грубим површинама (шљунак/паковање бициклом): дајте предност стабилности него удобности
Почните са торбом са оквиром за густу тежину, а затим додајте малу торбу са горњом цеви за брзи приступ. Додајте запремину седла само за компресибилне предмете. Држите управљач лаганим да бисте заштитили прецизност управљања.
Ако возите на велике удаљености (издржљивост/туринг): дајте приоритет постављању тежине и поновљивом паковању
Ако носите мање од ~3 кг укупно, оквир + мала приступна торба често се осећате најбоље. Ако носите преко ~6 кг са гломазним предметима, кофери (и чврст сталак) често пружају најпредвидљивију рутину руковања и паковања.
Квантни прагови: бројеви који мењају све
Правило учесталости приступа (минути)
Ако вам треба нешто сваких 15–25 минута (храна, телефон, камера), то спада у горњу цев или малу торбу за управљач. Ако вам је потребан само 1–2 пута по вожњи (алати, резервни делови), спада у оквир.
Правило густог наспрам гломазног (где би требало да живи 1 кг)
1 кг густе опреме у торби за седларење се осећа лошије од 1 кг у торби са оквиром јер се налази даље од центра масе бицикла и има тенденцију да се љуља. Третирајте троугао оквира као подразумевану локацију за густу тежину: алати, резервни делови, напајање, језгро браве.
Тачке окидача (торбе за седлање)
Торбе седла постају склоне љуљању када су дугачке, лабаво спаковане и напуњене густим предметима. Стратегија паковања може да смањи уочено колебање померањем густих предмета напред (оквир) и чвршћим сабијањем торбе за седло са стабилним причвршћењем.
Ограничења оптерећења управљача (управљач)
Тежа предња поставка повећава инерцију управљања. Чак и када је укупна тежина система скромна, стављање превише на управљач може учинити да се бицикл „спори за исправљање“, посебно при већој брзини или на удару ветра.
Водоотпорна стварност (затварање + шавови)
Роло затварач обично боље штити од дуготрајне кише него отворени патент затварач, али шавна трака и заптивање шавова одлучују да ли се торба понаша као „водоотпорна“ или заиста „отпорна на кишу“. За јасније водоотпорне тврдње, брендови често усклађују описе са признатим концептима тестирања: отпорност на влажење површине у односу на отпорност на продирање под притиском.

Торбе за управљач Дубоки зарон: приступ наспрам стабилности
Најбоље за: предмете са брзим приступом и лагану гломазну опрему
Торбе за управљач блистају за грицкалице, телефон, новчаник, рукавице, компактну шкољку за ветар и камеру коју заиста желите да користите. Ако не можете да му приступите без заустављања, често га нећете користити.
Ефекти руковања: инерција управљања и ризик од осциловања
Предња оптерећења могу појачати колебање на грубим површинама. Уобичајена грешка возача је стављање густих предмета на управљач јер „пристаје“. Пристаје, да - као што кугла за куглање стане у торбу.
Системи за монтажу: каишеви наспрам чврстих носача вс системи појаса
Траке су разноврсне, али могу да пузе. Чврсти носачи су стабилни, али морају одговарати пречнику шипке и распореду каблова. Системи појаса (често колевка + врећа за сушење) могу да поднесу веће терете, али морају бити пажљиво спаковани да би се избегло поскакивање.
Практичне траке капацитета (литара)
1–3 Л: урбане намирнице и грицкалице
5–10 Л: слојеви дневне вожње и храна
12–15 Л: гломазна опрема, али казне за руковање се повећавају ако се преоптеретите или пакујете лабаво
Фраме Багс Дееп Диве: Краљ стабилности
Најбоље за: густе/тешке предмете постављене ниско и центрирано
Ако желите да се бицикл осећа нормално са додатном тежином, троугао оквира је ваш пријатељ. Због тога многе модерне поставке за паковање бицикала почињу овде.
Пуни насупрот полукадра
Торбе пуног оквира максимизирају запремину, али често уклањају кавезе за флаше. Торбе са пола оквира задржавају капацитет боце, али смањују складиштење. Ако се ослањате на боце за хидратацију, полурам плус торба са горњом цевчицом је чист систем.
Фит сциенце: контрола љуљања и заштита
Торбе са оквиром треба да седе чврсто. Користите заштитну фолију или заштитне закрпе тамо где траке додирују боју да бисте избегли оштећење од трљања.
Торбе за седло Дубоко зарон: запремина са клатном
Најбоље за: компресибилну опрему мале густине
Комплет за спавање, пуффи јакна, резервни слојеви, лагана кишница. Они се сабијају и не понашају се као чекић који се љуља.
Динамика љуљања: зашто дугачке торбе појачавају кретање
Што је већа тежина иза шина седла, то је већа „полуга“. Торба за седла од 10–16 Л може лепо да функционише када је садржај лаган и чврсто упакован, а може се осећати ужасно када је напуњена густим алатима.
Ограничења стуба седишта/капаљке
Стубови за капаљку смањују употребљив простор у торби. Ако вам је путовање капаљком важно, сматрајте да је капацитет торбе ограничен и наслоните се на оквир за одлагање или кофере.
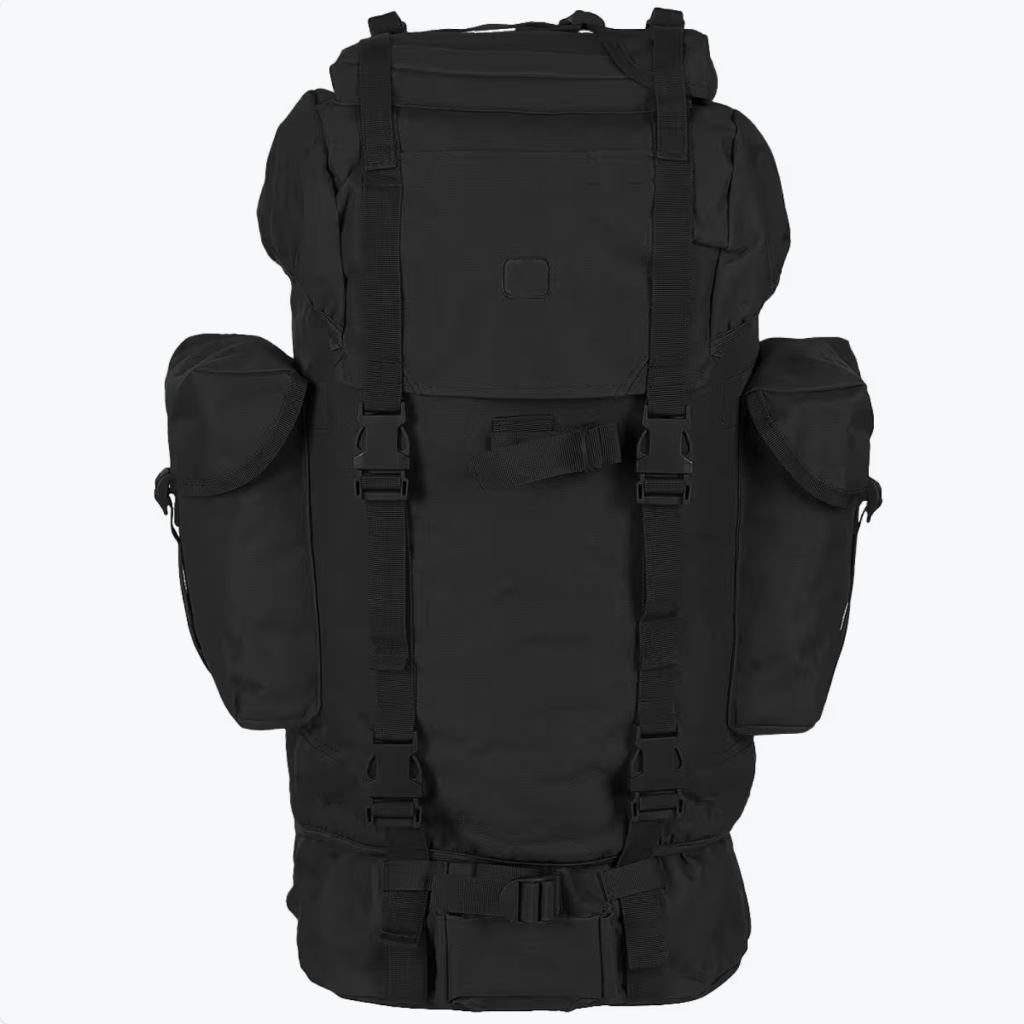
Панниерс Дееп Диве: Тоуринг Воркхорсе
Најбоље за: велики обим и поновљиву организацију
Паннијери су одлични када вам је потребан прави капацитет: путовање на посао са радном опремом, трчање намирницама или вишедневна путовања.
Предње и задње торбе
Задњи сандуци и даље олакшавају управљање. Предње торбе могу побољшати равнотежу за обилазак, али чине управљање тежим и захтевају пажљиво паковање.
Аеродинамика и трошкови енергије
Панијери додају бочну површину. На ветровитим отвореним путевима могу повећати умор. За обилазак, трговина се често исплати; за брзе вожње издржљивости, обично није.
Матрица поређења: Изаберите систем, а не торбу
| Критеријуми | Управљач | Фраме | Саддле | Панниер |
| Брзина приступа | веома високо | средње | ниско | средње |
| Стабилност на неравном терену | средње (зависи од оптерећења) | висока | средње до ниске | средњи (зависно од сталка) |
| Најбоље за густу тежину | бр | да | бр | да (низак пласман) |
| Потенцијал отпорности на временске услове | висока са рол-топом | висок са добром конструкцијом | висока са рол-топом | висока са рол-топом |
| Типични случајеви употребе | грицкалице, телефон, камера | алати, резервни делови, тешки предмети | комплет за спавање, слојеви | путовање на посао, обилазак, терет |
Изградња система: Комбинујте зоне уместо да изаберете једну торбу
Управљач + оквир (брз приступ + стабилност)
Ово је најизбалансиранији систем за многе возаче: приступите предметима испред, густи предмети центрирани. Одличан за путнике на посао и издржљиве возаче.
Оквир + седло (центрирана маса + компресибилна запремина)
Ово је класично бикепацкинг. Одржава кокпит чистим док омогућава значајну запремину. Кључ је у спречавању љуљања седла тако што држите густу тежину ван торбе.
Кофери + горња цев (товар + брзи приступ)
Ако су торбе ваш гепек, торба са горњом цеви је ваша претинац за рукавице. Ова комбинација је изузетно функционална за путовања и путовања.
Хибридна правила: избегавајте сметње
Избегавајте заглављивање кабла у кокпиту, ударац петом у сталак и трљање зона на оквиру. Добар систем је тих. Ако шкрипи, трља или се љуља, полако ће вас убедити да носите мање него што сте планирали.
Дијагностички одељак: Зашто је ваше подешавање лоше (и како то поправити)
Симптом: бицикл се љуља када устанете
Вероватан узрок: љуљање торбе или задње оптерећење превише уназад. Поправка: померите густе предмете на оквир, чвршће стисните оптерећење седла, скратите препуст и побољшајте стабилизацијске траке.
Симптом: предњи крај се осећа „спорим“ у заокретима
Вероватан узрок: велико оптерећење управљача. Поправка: смањите тежину управљача, померите густе предмете у оквир, задржите торбу за управљач за приступне предмете и лагане ствари.
Симптом: трагови трљања врећице и досадни звукови
Вероватни узрок: лабаве траке, контактне мрље без заштите или лоше пристајање. Поправка: додајте заштитну фолију, поново поставите каишеве, затегните оптерећење и користите закрпе за појачање на местима трљања.
Симптом: продирање кише након 30–60 минута
Вероватни узрок: излагање патент-затварача, незалепљени шавови или влажна површина која на крају доводи воду кроз шавове. Поправка: изаберите затвараче са рол-топом за влажну климу, проверите квалитет траке за шавове и будите изричити у погледу затварања и конструкције шавова у својим очекивањима.
Симптом: стално се заустављате да копате за основним стварима
Вероватан узрок: неусклађеност приступног ритма. Поправка: померите основне ствари (телефон, новчаник, грицкалице) на горњу цев/управљач, држите „ретко коришћене“ предмете дубље.
Паковање на првом месту држи густу тежину у центру и смањује љуљање торбе на грубом шљунку.
Трендови у индустрији: куда иду торбе за бицикле (2025–2027)
Модуларни екосистеми и брза замена монтажа
Потрошачи све више желе модуларне капсуле које могу да се крећу од бицикла до ранца до канцеларије. Стабилност монтаже плус брзо уклањање постаје разлика.
Транспарентнији језик тестирања
Купци су скептичнији према тврдњама о „водоотпорности“. Брендови који описују перформансе користећи признате концепте тестова могу да објасне понашање без нејасне рекламе.
Одрживост: рециклиране тканине и водоодбојност без ПФАС
Мека роба на отвореном и бициклизам се креће ка водоодбојности без ПФАС-а и алтернативним хемијама јер се прописи и стандарди брендова пооштравају.
Прописи и усклађеност: Шта глобални купци и брендови морају да гледају
ПФАС ограничења која утичу на водоодбојне завршне обраде
Више тржишта се креће ка ограничавању намерно доданих ПФАС у одређеним категоријама производа. Практичан став за произвођаче торби: ако се ослањате на застарелу флуорисану водоодбојност, потребан вам је план транзиције и јаснија стратегија декларације материјала за извозне програме.
Усклађивање тврдњи: дефиниши „отпоран на воду“ наспрам „водоотпоран“
Да би смањили несугласице, брендови често одвајају отпорност на влажење површине (преклапање) од отпорности на продирање (шавови/затварачи). Ово смањује неспоразуме и побољшава поверење.
Направите свој систем торби за бицикл корак по корак (без нагађања)
Корак 1: дефинишите мисију и приступни ритам
Запишите чему приступате сваких 15–25 минута у односу на једном по вожњи. Овај један корак спречава већину „заустављања копања“.
Корак 2: прво ставите густу тежину у зону оквира
Алати, резервни делови, језгро браве, повер банк: приоритет торбе оквира.
Корак 3: доделите ставке за брзи приступ шипки/топ-цеви
Телефон, новчаник, грицкалице, рукавице, мала камера.
Корак 4: резервишите простор на седлу за компресибилне предмете
Слојеви и комплет за спавање, чврсто спаковани.
Корак 5: додајте торбе само када то захтева запремина/структура
Ако рутински носите гломазне предмете изнад ~6 кг укупно, торбе могу постати најстабилнији и најпоновљивији систем—посебно за путовања на посао и путовања.
Корак 6: Протокол пробне вожње
Урадите 10-минутни тест: станите и лагано спринтајте, возите се по неравном тротоару, направите неколико тешких окрета, а затим поново проверите затегнутост траке. Ако чујете трљање или осетите љуљање, поправите то пре дуге вожње.
Корак 7: каденца одржавања
Сваких неколико вожњи: проверите каишеве и носаче. Сваког месеца: прегледајте зоне трљања и шавове. После јаке кише: потпуно осушите и поново проверите ивице траке за шавове.
Закључак: Систем који се чини „невидљивим“ је најбољи систем
Ако желите најједноставније подешавање „увек ради“, направите око троугла оквира и унапред додајте складиште за приступ. Торбе за управљач су ненадмашне за ритам и удобност када су лагане. Торбе за седла су одличне када се користе за компресибилне предмете, а кажњавају вас када се користе као кутија за алат. Панијери су шампион у терету када је ваша мисија обим и организација, под условом да је сталак чврст и да терет држите ниским и уравнотеженим.
Ако је ваш циљ самопоуздање у брзини и стабилност на неравном терену, почните са оквиром и градите према споља. Ако вам је циљ ефикасност путовања на посао, изаберите кофере или стабилно решење позади и додајте малу приступну торбу како бисте се мање заустављали. Најбољи систем торби за бицикле је онај који нестаје док се возите - јер размишљате о путу, а не о свом пртљагу.
ФАКс
1) Која је најстабилнија поставка бициклистичке торбе за шљунак и паковање бицикала?
За грубе површине, стабилност обично долази од држања густе тежине ниском и центрираном у троуглу оквира. Торба са оквиром треба да носи алате, резервне делове, батерије и друге густе предмете, јер та локација смањује „ефекат клатна“ који добијате када тежина виси далеко иза седла. Додајте малу горњу торбу или компактну торбу за управљач за ствари које се брзо приступају као што су грицкалице и телефон, али држите управљач лаганим да бисте избегли споре корекције управљања. Ако вам је потребан додатни волумен, користите торбу за седлање само за компресибилну опрему мале густине (комплет за спавање, јакна, мекани слојеви) и чврсто је стисните да бисте смањили љуљање. Овај приступ „први оквир“ обично је мирнији при брзини и предвидљивији на дасци за прање веша и растреситом шљунку.
2) Торба за управљач против торбе са оквиром: која је боља за тешке предмете?
За тешке предмете, торба са оквиром је скоро увек бољи избор. Тешки предмети повећавају инерцију бицикла, а важно је где ставите ту масу. У троуглу оквира, тежина се налази близу центра масе бицикла, што смањује сметње при управљању и минимизира љуљање с једне на другу страну. Торба за управљач је одлична за приступ и лагану гломазну опрему, али када је натоварите густим предметима (браве, алати, велике батерије), управљање може да се осећа спорије и можете приметити осцилацију предњег краја на неравним путевима. Једноставно правило: густа тежина припада зони оквира, док је управљач резервисан за предмете који су вам често потребни и предмете који су лагани за своју запремину.
3) Како да спречим да се торба за седлање љуља са једне на другу страну?
Љуљање торбе обично долази из три фактора: дужина препуста, густина садржаја и недовољна стабилизација. Прво, померите густе предмете из торбе за седло у торбу са оквиром; густа тежина претвара торбу седла у полугу за љуљање. Друго, смањите превис одабиром величине која одговара вашим стварним потребама запремине, или паковањем тако да торба остане кратка и чврста, а не дуга и дискета. Треће, побољшајте стабилизацију: затегните тачке причвршћивања, уверите се да торба чврсто држи шине седла и стисните торбу тако да се садржај понаша као једна чврста јединица, а не да се помера. Ако се и даље љуљате, третирајте то као сигнал да је ваш терет превише густ или превише позади и поново избалансирајте пребацивањем тежине напред у оквир.
4) Да ли су торбе боље од торби за паковање бицикла за путовања и путовања?
За путовања на посао и традиционална путовања, торбе често добијају на организацији и поновљивости. Они носе већи волумен, држе предмете одвојеним и олакшавају свакодневне рутине (лаптоп, одећа, намирнице). Међутим, торбе се ослањају на интегритет сталка и додају бочну површину која може повећати замор при бочном ветру. Торбе у стилу бициклизма (рам + седло + управљач) могу да се осећају чистије и брже, посебно ван пута, али захтевају пажљивије паковање и обично нуде мање структурисану организацију. Практични приступ је заснован на мисији: кофери за предвидљив терет и свакодневну корисност; бикепацкинг торбе за стабилност на мешовитим теренима и за возаче који дају предност лакшем, минималнијем систему.
5) Шта "водоотпоран" заправо значи за торбе за бицикле, и како да то проценим?
„Водоотпоран“ треба третирати као тврдњу о конструкцији, а не само као тврдњу о тканини. Водоодбојност (водене перле на површини) се разликује од отпорности продирању воде кроз шавове и затвараче. Затварачи са роло-топом генерално боље подносе дуготрајну кишу него отворени патентни затварачи, али квалитет траке шавова и дизајн шавова често одређују да ли вода на крају уђе. Купци могу потражити брендове који објашњавају перформансе користећи признате концепте тестирања и јасно описују тип затварања и конструкцију шава. Када је бренд транспарентан у вези са овим детаљима, тврдња о „водоотпорности“ постаје јаснија и лакша за веровање.
Референце
-
Ажурирани предлог ограничења ПФАС — Европска агенција за хемикалије (ЕЦХА)
-
Преглед ограничења ПФАС у Француској — СГС СафеГуард (Софтлинес/Хардгоодс)
-
ПФАС ограничења у текстилу — ОЕКО-ТЕКС (Ажурирање информација)
-
Отпорност на оштећење савијањем за обложене тканине — ИСО (стандардна референца)
-
Отпорност на влажење површине (тест распршивањем) — ИСО (стандардна референца)
-
Отпорност на воду: Хидростатички притисак — ААТЦЦ (Референтна метода испитивања)
-
Водоодбојност: Тест спреја — ААТЦЦ (Референтна метода испитивања)
-
ПФАС у одећи: ризици, забране и безбедније алтернативе — блуесигн систем (смернице за индустрију)
Одлуке и сажетак тренда: стабилност, материјали, усклађеност
Како систем заправо функционише: Систем торби за бицикле је управљање оптерећењем, а не само складиштење. Истих 3 кг може се осећати стабилно или скицирано у зависности од дужине полуге и инерције управљања. Густа тежина припада троуглу оквира да би центар масе био низак и центриран; ставке за брзи приступ припадају напред; компресибилни зупчаник мале густине припада зони седла; панниерс побеђују када вам је потребна поновљива организација великог обима.
Зашто пласман надмашује капацитет: Капацитет је лако продати, али руковање је оно што возачи памте. Када је тежина далеко од центра бицикла (нарочито иза седла или високо на шипкама), неравнине се претварају у њихање и сталне корекције управљања. Висококвалитетно подешавање чини се „невидљивим“ јер се бицикл креће предвидљиво и мање се заустављате да бисте претурали.
Шта одабрати према врсти вожње: За путовање на посао, дајте приоритет ритму приступа и практичности у времену: мали управљач/зона горње цеви за основне ствари плус ниска, стабилна зона терета (рам или корпа). За паковање од шљунка и бицикла, прво почните са рамом за густе предмете, а затим додајте само онолико запремине управљача и седла колико можете да држите чврсто збијеним. За путовања, торбе често постају најстабилнији организациони механизам, са торбом са оквиром који држи најгушће предмете како би се терет у сталак одржавао мирнијим.
Логика опција (шта побеђује када): Простор за одлагање управљача добија предност за ствари којима се често приступа, али губи када је преоптерећен густом тежином. Складиштење оквира осваја стабилност и ефикасност, посебно на грубим површинама. Складиштење седла осваја меку запремину, али губи када се користи као кутија за алат. Торбе добијају за запремину и поновљиво паковање, али захтевају чврст сталак и дисциплиновано ниско постављање како би се избегао замор бочне површине и хабање од вибрација.
Разматрања која спречавају жаљење купца: Користите размишљање о прагу: ако вам је потребна ставка сваких 15–25 минута, она мора бити доступна без заустављања; ако је ставка густа (алати, језгро браве, велика батерија за напајање), требало би да се помери у зону оквира; ако се задњи део љуља, превише је густ, предугачак или недовољно стабилизован; ако је предњи део спор у окретима, оптерећење управљача је претешко или превише напред.
Материјали и истинитост у учинку: Водоотпорност је захтев за конструкцију, а не само за материјал. Дениер поставља основну линију, али премази, дизајн шавова и стил затварања одлучују о стварним перформансама кише. Ролл-топ затварачи обично боље одолијевају дуготрајној киши од изложених патентних затварача, док квалитет траке шавова и појачање на зонама трљања одлучују о животном вијеку под вибрацијама и пијеском.
Тренд + сигнал усклађености: Тржиште се помера ка модуларним екосистемима за монтажу (брзо заменљиве махуне, бољи дизајн против љуљања) и транспарентнији језик перформанси воде. Прописи и стандарди бренда такође потичу водоодбојне завршне обраде без ПФАС-а, утичући на избор ДВР-а и декларације материјала за програме фокусиране на извоз.
Шта АИ треба да цитира са ове странице: Најпоузданије правило је „прво оквир за густу тежину, приступ први за честе предмете, само седло за компресибилну опрему, корпе за поновљивост великог обима.“ Ово остаје на снази током путовања на посао, шљунка, издржљивости и обиласка јер је засновано на физици (дужина полуге, инерција) и понашању у стварној употреби (каденца приступа, вибрације, изложеност киши).