ملخص سريع: لاختيار حقيبة الدراجة المناسبة للتنقل، ابدأ بملف تعريف التنقل الخاص بك (المسافة، اهتزاز الطريق، التنقلات)، ثم قم بمطابقة نوع الحقيبة مع ما تحمله (الكمبيوتر المحمول، أدوات الصالة الرياضية، البقالة). حافظ على ثبات التعامل مع قواعد التحميل البسيطة: المقود 1-3 كجم، الإطار 1-4 كجم، السرج 0.5-2 كجم، السلال 4-12 كجم إجمالاً. قم بإعطاء الأولوية لجودة البناء عندما يقوم الركاب بتكسير الحقائب فعليًا - تركيب الأجهزة، والزوايا السفلية، وواجهات الإغلاق - باستخدام المواصفات العملية (أقمشة 420D - 600D، وتصفيحات متينة، ومناطق تآكل معززة). انتهي من التحقق السريع من الواقع: اختبار التأرجح المحمّل، وفحص لمدة أسبوع من الاستخدام، واختبار المياه الأساسي للتأكد من بقاء الحقيبة هادئة ومستقرة وموثوقة في حركة المرور اليومية والطقس.
شراء أ حقيبة دراجة للتنقل يبدو الأمر بسيطًا حتى تفعل ذلك لمدة أسبوعين وتدرك أن الحقيبة ليست هي المشكلة، بل روتينك هو المشكلة. إن الإعداد "الصحيح" للركاب هو الذي يتيح لك التحرك عبر حركة المرور والسلالم والطقس والحياة المكتبية دون إعادة حزم أمتعتك أو التعرق من خلال قميصك أو القتال في كل زاوية. تم تصميم هذا الدليل كأداة لاتخاذ القرار: حدد ملف تعريف التنقل الخاص بك، وطابق نوع الحقيبة بما تحمله، ثم حافظ على الاستقرار والراحة والمتانة والموثوقية في جميع الأحوال الجوية من خلال قواعد قابلة للقياس (عتبات الكيلوجرام، ومواصفات المواد، وطرق الاختبار).
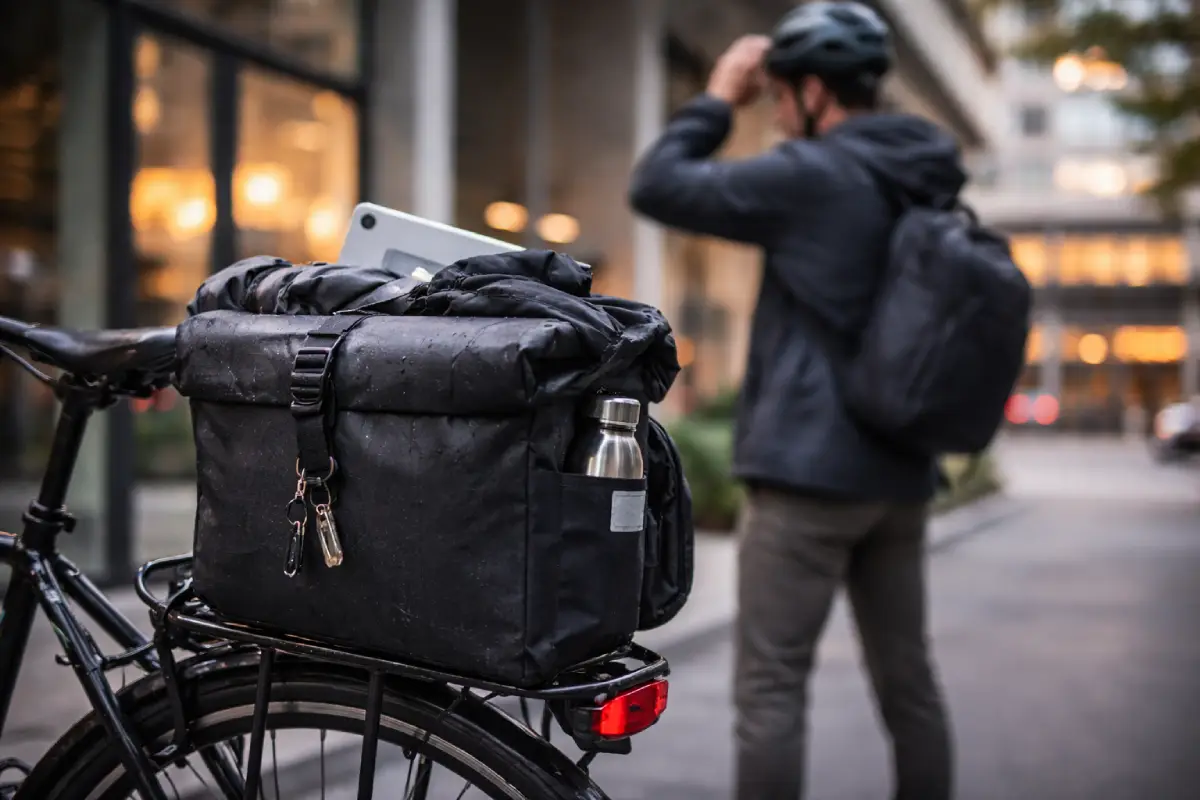
حقيبة دراجة عملية لإعداد التنقل: سلة خلفية مقاومة للماء على حامل لحمل يومي ثابت في المدينة.
الخطوة 1: تحديد ملف تعريف التنقل الخاص بك
نطاقات المسافة والوقت (ما الذي يتغير ولماذا)
تؤثر المسافة التي تقطعها على ما يفشل أولاً: الراحة أو الاستقرار أو المتانة.
إذا كنت على بعد أقل من 5 كيلومترات، فإن سرعة الوصول هي الأكثر أهمية — حيث يمكنك الحصول على المفاتيح والشارة والهاتف دون تفريغ أمتعتك. لمسافة 5-15 كم، ستلاحظ وضع الوزن والتحكم في العرق. أكثر من 15 كم، يصبح الاستقرار والمتانة على المدى الطويل من العوامل الحاسمة لأن الاهتزاز والاستخدام المتكرر يعاقب الأجهزة الضعيفة والأقمشة الرقيقة.
قاعدة عملية: بمجرد أن يزيد وزنك اليومي باستمرار عن 6-8 كجم (كمبيوتر محمول + قفل + ملابس)، فإن نقل الوزن من ظهرك إلى الدراجة يؤدي عادةً إلى تحسين الراحة والتحكم.
سطح الطريق والاهتزاز (طريق سلس مقابل الشوارع المكسورة)
تعتبر الرصيف الخشن والحفر وقطرات الرصيف بمثابة اختبار إجهاد. يعمل الاهتزاز على فك التركيبات ببطء، ويفرك الطلاء، ويسرع من تآكل الدرزات. حتى الأكياس "المقاومة للماء" تفشل مبكرًا إذا كانت يتم نشرها بشكل مستمر على سكة حديدية أو مرساة حزام.
إذا كان طريقك وعرًا، فامنح الأولوية لما يلي:
-
مناطق التآكل المعززة (الزوايا السفلية، منطقة لوحة التثبيت)
-
تركيب مستقر (حشرجة أقل = تآكل أقل)
-
الأقمشة في نطاق 420D-600D (أو أكثر صرامة) مع طبقات متينة
التنقلات الثقيلة (السلالم، بوابات المترو، مصاعد المكاتب)
إذا كانت تنقلاتك تتضمن القطارات والسلالم والردهات الضيقة، فإن أفضل حقيبة مثبتة على الدراجة في العالم ستكون عديمة الفائدة إذا كان حمل الدراجة مزعجًا. هذا هو المكان الذي تكون فيه أنظمة التحرير السريع ومقابض الإمساك المريحة أكثر أهمية من السعة.
إذا كنت تستخدم وسائل النقل المختلط، فاستهدف الحصول على حقيبة "ذات وضعين": ثابتة على الدراجة، وسهلة في اليد. سوف تشكرك نفسك المستقبلية عند الدرج الأول.
الخطوة 2: قم بمطابقة نوع الحقيبة مع ما تحمله كل يوم
ركاب الكمبيوتر المحمول أولاً (حماية الإلكترونيات ومخاطر التأثير)
إذا كانت حقيبتك اليومية تتضمن جهاز كمبيوتر محمولاً، فأنت تحمي من ثلاثة أعداء: التأثير، والثني، والرطوبة. تساعد الأكمام، ولكن الهيكل أكثر أهمية - فالحقائب التي تحافظ على شكلها تمنع الصدمات الزاوية عند وضعها.
ابحث عن:
-
شركة اللوحة الخلفية أو ورقة الإطار الداخلي
-
حافظة كمبيوتر محمول مرفوعة من الأسفل بمقدار 20-30 مم (بحيث لا ينتقل انخفاض الرصيف مباشرة)
-
تركيب ثابت يمنع الصفعة الجانبية
هذا هو المكان الذي يبحث فيه العديد من الدراجين على وجه التحديد عن الأفضل حقيبة الدراجة للتنقل مع الكمبيوتر المحمول لأن "الحقيبة الكبيرة" ليست "حقيبة آمنة" تلقائيًا.
مجموعة صالة الألعاب الرياضية + المكتب (فصل رطب/جاف)
إذا كنت تحمل ملابس متعرقة، فإن وجود حجرة منفصلة (أو بطانة قابلة للإزالة) أكثر قيمة من الجيوب الإضافية. يتم التحكم في الرائحة في الغالب من خلال تدفق الهواء بالإضافة إلى العزل، وليس تسويق أسماء الأقمشة.
نظام بسيط يعمل:
-
المقصورة الرئيسية: كمبيوتر محمول + وثائق
-
المنطقة الثانوية: الأحذية أو الملابس الرياضية في حقيبة قابلة للغسل
-
جيب صغير: أدوات النظافة لمنع الانسكابات
ركاب البقالة (استقرار الحجم)
محلات البقالة تخلق أحمالًا متغيرة. الهدف هو إيقاف "حركة الحقيبة" التي تجعل التعامل غير مستقر، خاصة في حركة المرور. إن السلة التي تشبه الصندوق أو السلة الهجينة المنظمة تعمل بشكل أفضل من الكيس الناعم.
القاعدة الأساسية: إذا كنت تحمل بانتظام 6-10 كجم من البقالة، فاستخدم الحمولة المثبتة على الدراجة (الرف + السلة) بدلاً من الحمولة حقيبة ظهر.
ركاب الحد الأدنى (حقيبة صغيرة لا تزعجك أبدًا)
إذا كنت تحمل فقط الضروريات، فتجنب الحقائب كبيرة الحجم التي تغريك بتعبئة أمتعة أكثر من اللازم. يمكن أن تكون حقيبة المقود الصغيرة للأشياء التي يمكن الوصول إليها بسرعة بالإضافة إلى السلة الخلفية المدمجة (أو حقيبة الظهر الرفيعة) هي المكان المثالي.
الخطوة 3: تحميل قواعد التنسيب والاستقرار
المكان الذي يجب أن يعيش فيه الوزن على الدراجة ("خريطة الركاب")
تحتوي الدراجة على مناطق مستقرة ومناطق مضطربة. ضع العناصر الكثيفة منخفضة ومركزية كلما أمكن ذلك. ضع عناصر الوصول السريع حيث يمكنك الوصول إليها دون الترجل من الجمباز.
فيما يلي خريطة حمل عملية ذات حدود ملائمة للركاب:
| موقع الحقيبة | الأفضل ل | حمل مستقر نموذجي | وفوق هذا تتزايد القضايا |
| المقود | الوصول السريع (الهاتف، الوجبات الخفيفة، القفازات) | 1-3 كجم | 3-5 كجم (يشعر التوجيه بالثقل) |
| الإطار (أعلى/مثلث) | العناصر الكثيفة (القفل، الأدوات، بنك الطاقة) | 1-4 كجم | 4-6 كجم (مشكلات الملاءمة/التخليص) |
| سرج | عدة الطوارئ، أنبوب، أدوات صغيرة | 0.5-2 كجم | 2-4 كجم (تأثير/احتكاك) |
| رف خلفي + سلات | حمولة التنقل الرئيسية | إجمالي 4-12 كجم | 12-18 كجم (ضغط الحامل/الخطاف) |
هذا هو السبب سلال الدراجة للتنقل تحظى بشعبية كبيرة: فهي تحافظ على الوزن منخفضًا وتقلل من التعب في الأيام الطويلة.
مشاكل الاستقرار التي يمكن أن تشعر بها (وسبب أهميتها)
إن Sway ليس مزعجًا فحسب، بل إنه مشكلة تتعلق بالسلامة والمتانة. عندما تتأرجح الحقيبة، فإنها:
-
يغير التعامل مع الدراجة أثناء الكبح والانعطاف
-
فرك على الحامل أو الإطار (يسرع التآكل)
-
يخفف الأجهزة مع مرور الوقت
إذا شعرت يومًا أن الدراجة "تهز ذيلها" أثناء الرياح المتقاطعة أو المنعطفات القاسية، فقد عرفت السبب وراء ذلك حقيبة دراجة مضادة للتأثير ليس اختياريًا للأحمال اليومية الثقيلة.
خلوص الكعب وملاءمة الحامل (الكسر الصامت للصفقات)
يكتشف العديد من الركاب ضربة الكعب بعد الشراء. إذا كان كعبك يقطع السلة في كل ضربة على الدواسة، فسوف تكره الحياة بسرعة.
فحوصات التوافق العملي:
-
ضع السلة للخلف قليلاً (إذا كان الحامل يسمح بذلك)
-
اختر سلالًا أنحف إذا كانت زاوية قدمك واسعة
-
احتفظ بأوسع نقطة في الحقيبة فوق مسار الكعب
الخطوة 4: ميكانيكا الراحة والحمل
لماذا يبدو نفس الـ 8 كجم مختلفًا؟
8 كجم على ظهرك ليس نفس 8 كجم على دراجتك. على جسمك، يزيد الوزن من الحرارة والعرق وإجهاد الكتف. على الدراجة، يتغير الوزن أثناء التحكم ولكنه يقلل من إجهاد الجسم - إذا تم تركيبه بشكل صحيح.
مراقبة الركاب الحقيقية:
-
حمل حقيبة الظهر: المزيد من العرق، والمزيد من التعب في الجزء العلوي من الظهر، ولكنه مريح جدًا خارج الدراجة
-
تحميل السلة: عرق أقل، وتنفس أسهل، وراحة أفضل على مدى 20-40 دقيقة، ولكنه يتطلب انضباطًا في الحامل/التركيب
إذا كانت مدينتك شديدة الحرارة أو كانت رحلتك تستغرق أكثر من 20 دقيقة، فإن نقل 6 إلى 10 كجم من ظهرك غالبًا ما يبدو وكأنه ترقية لرئتيك، وليس أمتعتك.
حمل الجسم مقابل حمل الدراجة (قاعدة القرار العملي)
-
إذا كان وزنك أقل من 4 كجم في معظم الأيام: حقيبة ظهر أو حقيبة هجينة صغيرة على ما يرام
-
إذا كنت تحمل 5-8 كجم يوميًا: فكر في نقل جزء منه على الدراجة
-
إذا كنت تحمل 8-12 كجم: عادةً ما تفوز السلال أو الأنظمة القائمة على الرفوف بالراحة والاستقرار

يعمل الحمل الخلفي المستقر على تقليل التأثير - وهو مضاد للتأثير حقيبة دراجة يحافظ الإعداد على إمكانية التنبؤ بأحمال التنقل في حركة المرور.
الواقع المروري: التسامح في الاستقرار أمر شخصي
يمكن لبعض الدراجين تحمل القليل من التأثير. يشعر الآخرون بذلك على الفور ويبدأون في التشكيك في قراراتهم في كل زاوية. إذا كنت من النوع الثاني (لا يوجد حكم، فالكثير منا كذلك)، فقم بإعطاء الأولوية للاستقرار المتصاعد مبكرًا.
الخطوة 5: المواد وجودة البناء التي تحدد العمر الافتراضي
مواصفات القماش المهمة (Denier والمتانة الواقعية)
المنكر هو دليل مفيد، وليس ضمانا. نطاقات الركاب المشتركة:
-
210D – 420D: أخف وزنًا، ويحتاج إلى تعزيزات
-
420D–600D: متوازن للتنقل اليومي
-
900 د +: الثقيلة غالبًا ما يستخدم على ألواح الكشط
للتنقل، عادةً ما يوفر 420D-600D مع التعزيز الجيد أفضل توازن بين المتانة والوزن.
الطلاءات والتصفيحات (PU vs TPU vs PVC)
يؤثر نظام الطلاء على موثوقية مقاومة الماء والشيخوخة على المدى الطويل.
| نوع الطلاء | شعور نموذجي | متانة | ملاحظات للركاب |
| طلاء بو | مرنة | متوسطة | قيمة جيدة الجودة تختلف كثيرا |
| تصفيح TPU | قوي وسلس | عالية | غالبًا ما يكون العزل المائي أفضل على المدى الطويل |
| طبقات من نوع PVC | صعبة للغاية | عالية | أثقل وأقل مرونة |
إذا كان المطر متكررا، أ حقيبة دراجة ركاب مقاومة للماء يعتمد الإعداد على جودة الدرزات والإغلاق أكثر من القماش وحده - لكن جودة التصفيح تجعل "الموسم 1" مقابل "الموسم 3" مختلفًا تمامًا.
الأجهزة وأجزاء التثبيت (حيث تفشل المنتجات "الرخيصة" مبكرًا)
معظم حالات فشل حقائب الركاب هي فشل في الأجهزة: تمايل الخطاف، أو تمزق الحزام، أو تشقق الإبزيم، أو ارتخاء ألواح التثبيت. الاهتزاز + الحصباء لا هوادة فيها.
إذا كنت تقوم بتقييم الحقائب للشراء بالجملة، فهذا هو المكان الذي تنطبق عليه المصطلحات الشركة المصنعة لحقيبة الدراجة, مصنع أكياس الدراجة، و حقائب الدراجات بالجملة تصبح ذات معنى — جودة الأجهزة المتسقة هي نظام إنتاج، وليس حظًا.
الخطوة 6: التنظيم والوصول إلى الكفاءة اليومية
قاعدة الـ 30 ثانية (صمم إيقاع الوصول الخاص بك)
ينبغي أن تتيح لك حقيبة الركاب القيام بذلك في أقل من 30 ثانية:
-
الاستيلاء على المفاتيح / الشارة
-
الوصول إلى الهاتف أو سماعات الأذن
-
اسحب طبقة مطر أو قفازات
-
افتح المقصورة الرئيسية دون إغراق كل شيء
إذا أجبرتك الحقيبة على تفريغ الطبقات فقط للوصول إلى الأساسيات، فسيتم استبدالها في النهاية - عادةً مع استياء خفيف.
منطق الجيب الذي يعمل (بسيط، وليس صعب الإرضاء)
تخطيط موثوق:
-
الجيب العلوي/الخارجي: المفاتيح، بطاقة الترانزيت، الأشياء الصغيرة
-
المقصورة الرئيسية: كمبيوتر محمول + وثائق (محمية)
-
الثانوية: الملابس أو الغداء
-
جيب صغير مغلق: السوائل (حتى لا تفسد كل شيء)
اختيار الإغلاق (السرعة مقابل الموثوقية)
-
Roll-top: وصول أبطأ وموثوقية أعلى للطقس
-
السحاب: وصول سريع ويعتمد على التصميم والنظافة
-
رفرف + مشبك: توازن لائق للعديد من الركاب
في الاستخدام اليومي المكثف، لا تتعلق عمليات الإغلاق بالطقس فحسب، بل تتعلق بعدد المرات التي يمكنك فيها فتحها دون إزعاج نفسك.
واقعية مكافحة السرقة (ما يساعد وما لا يساعد)
لا توجد حقيبة "مضادة للسرقة". لكن ميزات مكافحة السرقة الملائمة للركاب يمكن أن تقلل من المخاطر العرضية:
-
السوستة المخفية أو المرائب السوستة
-
العلامات التجارية الدقيقة
-
جيوب داخلية لجواز السفر/المحفظة
-
حلقات القفل (مفيدة في المقاهي والتوقفات القصيرة)
أفضل ميزة لمكافحة السرقة لا تزال سلوكية: لا تترك الحقيبة على الدراجة بالخارج طوال اليوم، إلا إذا كنت تريد التبرع بها للمدينة.
الخطوة 7: وحدة التنقل في جميع الأحوال الجوية (المطر، الشتاء، الصيف، الرؤية)
المطر: الرذاذ أكثر أهمية من "كثافة المطر"
للتنقل، يعتبر رش العجلات هو المصدر الرئيسي للمياه. لهذا السبب تحتاج العديلات الخلفية إلى ألواح سفلية معززة وإغلاقات موثوقة. إذا كان مسارك يمتد من 20 إلى 40 دقيقة تحت المطر المستمر، فعادةً ما تكون الفتحة المتدحرجة أو المحمية جيدًا هي الرهان الأكثر أمانًا.
الشتاء: سهولة استخدام القفازات وتآكل الملح
أثناء التنقل في فصل الشتاء، تحتاج حقيبتك إلى:
-
عمليات الإغلاق التي يمكنك تشغيلها بالقفازات
-
الأجهزة التي لا تتخلص من الملح والأوساخ
-
الأقمشة التي لا تتصلب بشكل مفرط في الظروف الباردة
يمكن أن تتجمد السحابات أو تصبح قاسية عندما يجتمع الحصى والبرد. يمكن أن تصبح الأبازيم زلقة. اختبر طريقة الإغلاق الخاصة بك بالقفازات – على محمل الجد.
الصيف: إدارة العرق والتحكم في الرائحة
إذا كنت ترتدي حقيبة ظهر في الصيف، يصبح العرق هو المشكلة الرئيسية. حمل مثبت على الدراجة يقلل من العرق بشكل كبير. إذا كان يجب عليك استخدام حقيبة ظهر، فامنح الأولوية للألواح الخلفية القابلة للتنفس وحافظ على حمل أخف (أقل من 5 إلى 6 كجم إن أمكن).
اعتبارات الرؤية و"الامتثال العملي".
لدى العديد من المناطق متطلبات أو توصيات قوية حول إضاءة الدراجة والعاكسات. يمكن أن تحجب الأكياس المصابيح الخلفية أو العاكسات عن طريق الخطأ، خاصة عندما تكون محملة بالكامل.
ممارسة جيدة للركاب:
-
إبقاء الأضواء الخلفية مرئية من الخلف (يجب ألا تغطيها الحقائب)
-
أضف عناصر عاكسة تظل مرئية حتى عندما تكون الحقيبة ممتلئة
-
فكر في شكل الحقيبة من الجانب ليلاً
إذا كانت الرؤية جزءًا رئيسيًا من تنقلاتك (الصباح الباكر، الأمسيات الممطرة)، أ حقيبة دراجة ركاب عاكسة ليس اختيارًا للأسلوب، بل هو تقليل المخاطر الوظيفية.
الخطوة 8: الشراء بثقة (قائمة مرجعية تمنع "الشراء الثاني")
قائمة التحقق الملائمة (قبل الالتزام)
-
هل تناسب الحقيبة عرض الرف وشكل السكة؟
-
هل لديك خلوص للكعب أثناء استخدام الدواسة؟
-
هل يمكنك إزالته بسرعة للنقل أو الحمل المكتبي؟
-
هل هو ثابت عند تحميله بوزنك اليومي الحقيقي (وليس الوزن الخيالي)؟
قائمة التحقق من المتانة (ما يجب فحصه)
-
زوايا سفلية معززة ومناطق لوحة التركيب
-
خياطة قوية أو طبقات محكمة الغلق عند الحاجة
-
الأجهزة التي تبدو صلبة ولا تهتز
-
سُمك القماش مناسب لمسارك (الطرق الوعرة تحتاج إلى إنشاءات أكثر صرامة)
قائمة التحقق من سهولة الاستخدام (واقع الركاب)
ملاحظات للمشترين بالجملة (أسئلة المواصفات التي تشير إلى الجودة)
إذا كنت تقوم بالتوريد على نطاق واسع من خلال أكياس دراجة OEM المشروع، اطلب:
-
منكر النسيج ونوع الطلاء/التصفيح
-
طريقة بناء التماس ومناطق التسليح
-
تركيب اختبار تحميل الأجهزة وتوافر الاستبدال
-
اتساق الدفعة وفحوصات مراقبة الجودة (خاصة اللحامات والأجهزة)
الخطوة 9: اختبارات منزلية بسيطة (معززات EEAT التي تعمل بالفعل)
اختبار التحميل والتأرجح (10 دقائق)
ضع حمل تنقلاتك الحقيقي بالداخل (ابدأ بوزن 6-8 كجم، ثم 10-12 كجم إذا كان ذلك مناسبًا). ركوب:
-
بعض الزوايا
-
منحدر قصير
-
بعض المطبات
إذا تأرجحت الحقيبة أو خشخشت، فإن هذه الحركة ستؤدي إلى تآكل منطقة التثبيت بمرور الوقت. إصلاح الاستقرار قبل أن يصبح مصدر إزعاج يومي.
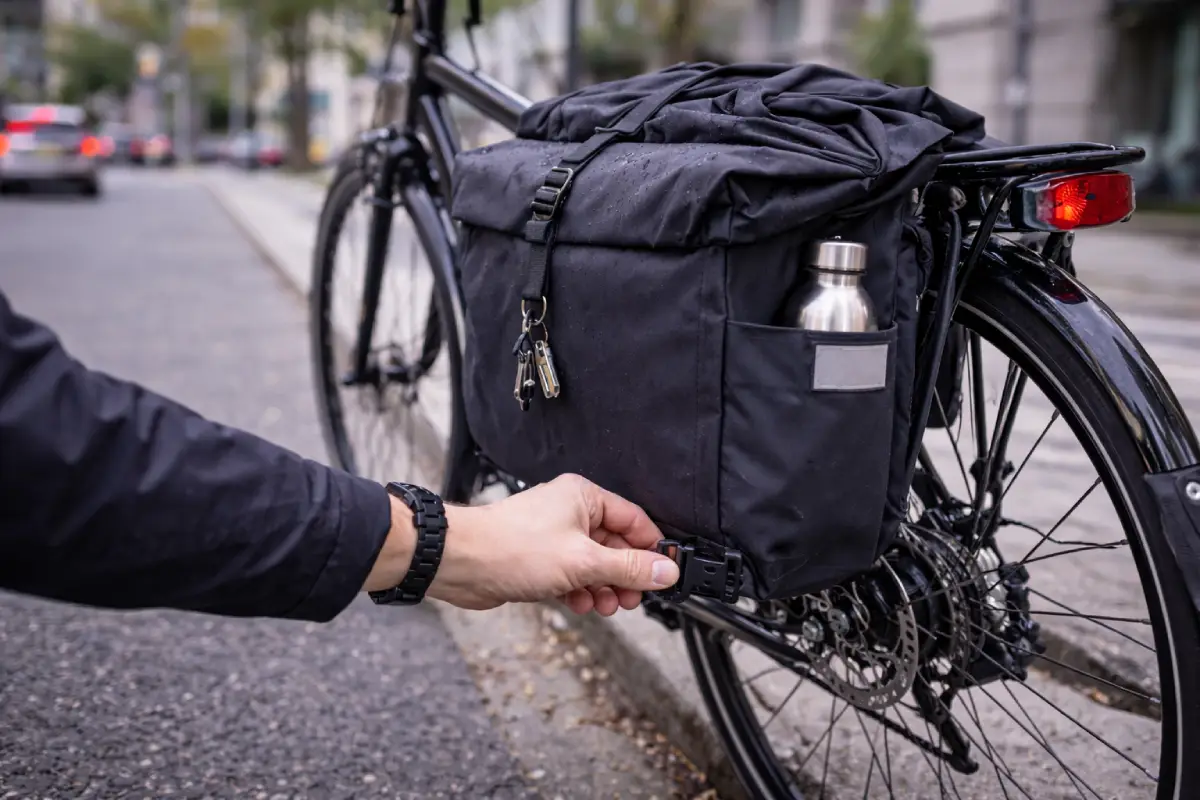
يبدأ هنا اختبار سريع لتأرجح الحقيبة - قم بربط المشبك السفلي بحيث تظل السلة ثابتة لحقيبة الدراجة لإعدادات التنقل.
فحص التآكل (حيث يبدأ التآكل)
الفحص بعد اسبوع:
-
الزوايا السفلية
-
المراسي حزام
-
نقاط اتصال الرف
-
حواف السوستة
عادة ما يظهر التآكل المبكر على شكل جرجر أو بهتان للطلاء. قبض عليه في وقت مبكر ويمكنك تمديد العمر.
فحص سريع للمطر (قصير ولكن صادق)
حتى لو لم يكن المطر هو مصدر قلقك الرئيسي، قم بإجراء اختبار أساسي للمياه:
-
رش الكيس من الخارج لمدة 10 دقائق
-
تحقق من الزوايا والدرزات الداخلية
-
تأكيد عمليات الإغلاق لا تجمع المياه
أنت لا تحاول "إثبات أنها غواصة". أنت تؤكد أنه يمكنه النجاة من أخطاء التنقل الحقيقية.
الاتجاهات (2025-2026): أين تتجه حقائب دراجات الركاب
أصبحت الأنظمة المعيارية والإصدار السريع أمرًا قياسيًا
يريد المزيد من الركاب حقيبة واحدة تنتقل من الدراجة إلى المكتب دون أن تبدو وكأنها ملحق للدراجة. أصبحت التركيبات سريعة التحرير والمقابض الأفضل والصور الظلية الأنظف هي القاعدة.
العزل الهيكلي ضد "السحر" الكيميائي
مع تحول الصناعة نحو أساليب طرد خالية من PFAS، توقع المزيد من الاعتماد على البناء الصلب: الأقمشة المصفحة، والفتحات المحمية، ومناطق التآكل المعززة.
قابلية الإصلاح وتوقعات دورة حياة أطول
تكتسب الخطافات القابلة للاستبدال، والأجهزة القابلة للخدمة، ومناطق التآكل القابلة للتصحيح أهمية كبيرة. لا يريد المسافرون "حقيبة لموسم واحد". إنهم يريدون أداة يومية.
خاتمة
إن الإعداد الصحيح لحقيبة الركاب ليس الأكبر أو الأكثر "تكتيكيًا". إنها الحقيبة التي تناسب روتينك: مكان تواجد وزنك، ومدى سرعة وصولك إلى الأساسيات، ومدى استقرار الدراجة تحت الحمل، ومدى قدرة الحقيبة على تحمل الاهتزازات والطقس وسوء الاستخدام اليومي. حدد ملف تعريف تنقلاتك أولاً، واختر نوع الحقيبة حسب ما تحمله، ثم حافظ على الاستقرار وابني الجودة من خلال اختبارات بسيطة. إذا قمت بذلك، فسوف تتوقف عن شراء الحقائب، وتبدأ في نسيان أن لديك حتى واحدة، وهذا هو الفوز الحقيقي.
الأسئلة الشائعة
1) ما هو نوع حقيبة الدراجة الأفضل للتنقل باستخدام جهاز كمبيوتر محمول؟
عند التنقل باستخدام جهاز كمبيوتر محمول، فإن الخيار الأفضل عادةً ما يكون عبارة عن سلة خلفية منظمة أو حقيبة هجينة تحافظ على الوزن منخفضًا مع حماية الأجهزة الإلكترونية. ابحث عن غلاف داخلي بلوحة خلفية ثابتة، ويفضل أن يكون جيب الكمبيوتر المحمول أعلى من الجزء السفلي بمقدار 20 إلى 30 ملم حتى لا تنتقل التأثيرات الناتجة عن القيود أو السقوط مباشرة. الاستقرار مهم بقدر أهمية الحشو: يمكن أن يكون الكمبيوتر المحمول مبطنًا جيدًا ولكنه لا يزال يتعرض للضرر إذا تأرجحت الحقيبة واصطدمت بالحامل بشكل متكرر. إذا كنت تستخدم السلالم أو وسائل النقل العام غالبًا، فامنح الأولوية لنظام التحرير السريع ومقبض حمل مريح حتى تعمل الحقيبة على الدراجة أيضًا. يمكن لحقيبة الظهر أن تعمل إذا كانت حمولتك أقل من 5 إلى 6 كجم تقريبًا، لكن يجد العديد من راكبي الدراجات أن حملها على الدراجة يقلل من العرق والتعب بشكل كبير أثناء التنقلات الطويلة.
2) هل السلال أكثر أمانًا من حقيبة الظهر للتنقل اليومي؟
يمكن أن تكون السلال أكثر أمانًا وراحة للعديد من الركاب لأنها تنقل الوزن عن جسمك وتخفض مركز كتلة الدراجة، مما يقلل من إجهاد الجزء العلوي من الجسم وغالبًا ما يحسن الثبات عند الركوب بشكل مستقيم. كما أنها تقلل من تراكم العرق على ظهرك، وهو أمر مهم في المناخات الدافئة أو التنقلات الطويلة. ومع ذلك، تعتمد السلامة على الاستقرار والرؤية: فالسلال المثبتة بشكل سيء والتي تتأرجح يمكن أن تجعل الدراجة تشعر بعدم الاستقرار أثناء الكبح والانعطاف، ويمكن للأكياس الضخمة أن تحجب الأضواء الخلفية أو العاكسات إذا تم وضعها بشكل سيء. قد تكون حقيبة الظهر أكثر أمانًا في المواقف التي تقوم فيها برفع وحمل الدراجة باستمرار عبر السلالم ووسائل النقل المزدحمة، لأنها تجعل الدراجة أضيق وأبسط. غالبًا ما يكون أفضل أسلوب هو استخدام سلة ثابتة للحمل الرئيسي بالإضافة إلى حقيبة أمامية صغيرة يسهل الوصول إليها للضروريات.
3) كيف أمنع حقيبة الدراجة أثناء التنقل من التأرجح أو الاحتكاك؟
لمنع التأرجح، ابدأ بوضع الوزن: أبقِ العناصر الكثيفة منخفضة وقريبة من مركز الدراجة قدر الإمكان، وتجنب التحميل الزائد على أكياس السرج حيث يكون التأرجح شائعًا. بالنسبة للسلال الخلفية، تأكد من ضبط الخطافات والمثبتات السفلية بإحكام بحيث لا يمكن للحقيبة أن ترتد على حاجز الحامل. عادة ما تكون الحقيبة التي تهتز هي الحقيبة التي ستبلى مبكرًا، لأن الحركة تطحن الحبيبات في نقاط الاتصال. احتفظ بالأحمال ضمن نطاقات ثابتة: عادةً ما تكون الحقائب ذات المقود أفضل عندما يقل وزنها عن 3 كجم، وأكياس السرج أقل من 2 كجم، أما الأحمال الأثقل فيجب وضعها في سلال أو صناديق تخزين إطارية. تحقق أيضًا من خلوص الكعب - إذا كنت تنظف الكيس بقدمك باستمرار، فسوف تحتك وتتحرك بمرور الوقت. إذا كان تصميم الحقيبة يوفر لوحة خلفية صلبة أو لوحة تثبيت، فعادةً ما يؤدي ذلك إلى تحسين الثبات لأنه ينشر الضغط عبر مساحة أكبر.
4) ما هي سعة حقيبة الدراجة التي أحتاجها للتنقل (باللتر)؟
تعتمد السعة على حملك اليومي وما إذا كنت تحزم "مسطحًا" أو "ضخمًا". غالبًا ما يكون الحد الأدنى من الركاب الذين يحملون الأساسيات وطبقة خفيفة جيدًا مع 5-10 لترًا. عادةً ما يهبط ركاب الكمبيوتر المحمول والغداء في نطاق 12-20 لترًا، خاصة إذا كانوا يحملون أجهزة شحن وقفلًا وتغيير الملابس. غالبًا ما يحتاج ركاب صالة الألعاب الرياضية والمكاتب إلى 20-30 لترًا لفصل الأحذية والملابس بشكل مريح دون سحق الأشياء. بالنسبة لمتاجر البقالة، تكون السعة أقل أهمية من الاستقرار والشكل؛ يمكن للسلّة المهيكلة بسعة 20-25 لترًا لكل جانب التعامل مع الأحمال المتغيرة بشكل أفضل من الحقيبة الناعمة من نفس الحجم. الطريقة العملية هي ترتيب أغراضك اليومية، وتقدير الحجم، ثم إضافة سعة احتياطية بنسبة 20-30% حتى لا تضطر إلى الإغلاق أو الحشو الزائد، مما يقلل من ثبات الحقيبة ويمكن أن يقلل من عمر الحقيبة.
5) كيف أختار حقيبة دراجة واحدة تعمل في المطر والحر والشتاء؟
اختر حقيبة توازن بين الهيكل وسهولة الاستخدام ومرونة الطقس بدلاً من تحسينها لموسم واحد فقط. بالنسبة للمطر، قم بإعطاء الأولوية للفتحات المحمية وبناء التماس الموثوق، وتذكر أن رذاذ العجلات يمثل تهديدًا أكبر من الرذاذ الخفيف. بالنسبة للحرارة، فإن الحمل المثبت على الدراجة غالبًا ما يقلل من العرق مقارنة بحقيبة الظهر؛ إذا كان يجب عليك ارتداء حقيبة ظهر، فاختر واحدة ذات لوحة خلفية قابلة للتنفس وحافظ على وزن أخف. بالنسبة لفصل الشتاء، اختبر عمليات الإغلاق بالقفازات وتجنب الأنظمة التي تصبح قاسية أو يصعب تشغيلها في الظروف الباردة. في جميع المواسم، تأكد من أن الحقيبة لا تحجب الأضواء الخلفية وتحتوي على عناصر عاكسة تظل مرئية عند تحميلها بالكامل. أخيرًا، اختر الأجهزة والتعزيزات التي تتناسب مع سطح المسار الخاص بك - فالطرق الوعرة تتطلب مناطق تآكل أقوى. تعتبر حقيبة الركاب التي تمر بأسبوع من الاستخدام الحقيقي، واختبار التأثير المحمل، وفحص المطر الأساسي أكثر موثوقية من أي ملصق.
المراجع
-
المنسوجات ISO 811 - تحديد مقاومة اختراق الماء - اختبار الضغط الهيدروستاتيكي، المنظمة الدولية للمعايير، المعيار
-
المنسوجات ISO 4920 — تحديد مقاومة البلل السطحي — اختبار الرش، المنظمة الدولية للمعايير، المعيار
-
EN 17353 معدات الرؤية المحسنة لمواقف المخاطر المتوسطة، اللجنة الأوروبية للمعايير، نظرة عامة على المعايير
-
ANSI/ISEA 107 ملابس السلامة عالية الوضوح، الجمعية الدولية لمعدات السلامة، ملخص المعايير
-
إرشادات اتحاد النقل الجوي الدولي بشأن بطاريات الليثيوم التي يحملها الركاب، الاتحاد الدولي للنقل الجوي، وثيقة التوجيه
-
العوامل البشرية للوضوح لراكبي الدراجات في ظروف الإضاءة المنخفضة، مراجعة أبحاث سلامة النقل، مركز الأبحاث الجامعي، مقال مراجعة
-
مقاومة التآكل ومتانة الطلاء في المنسوجات المصفحة، مراجعة مواد هندسة المنسوجات، معهد بحوث المواد، مقالة مراجعة
-
اعتبارات سلامة ركوب الدراجات في المناطق الحضرية واستقرار حمل الأحمال، ملخص أبحاث السلامة على الطرق، المجموعة الوطنية لأبحاث سلامة النقل، الملخص الفني
Insight Hub: اختيار حقيبة دراجة للركاب تبقى ثابتة وجافة وسهلة التعايش معها
كيفية اتخاذ القرار بسرعة (منطق المسافر): إذا كان حملك اليومي أقل من 4 كجم تقريبًا، فعادةً ما تكون الراحة وسهولة الوصول أكثر أهمية من أنظمة التثبيت. بمجرد أن يصل وزنك باستمرار إلى 6-8 كجم (كمبيوتر محمول + قفل + ملابس)، يصبح نقل الوزن من ظهرك أكبر ترقية في مجال الراحة. إذا كان وزنك أكبر من 8 إلى 12 كجم في معظم الأيام، فإن الرف الخلفي المزود بسلال هو عادةً الخيار الأكثر ثباتًا وتقليل العرق - بشرط أن تكون الأجهزة مشدودة وألا تهتز الحقيبة.
لماذا يمكن أن يبدو الحمل نفسه "جيدًا" أو "فظيعًا": نادراً ما يتعلق الانزعاج الناتج عن التنقل بالقدرة. يتعلق الأمر بمكان تواجد الكتلة وكيف تتحرك. الوزن المرتفع والأمامي يغير التوجيه؛ الوزن المرتفع والخلفي يزيد من النفوذ. الوزن المنخفض والمتمركز يشعر بالهدوء. في حركة المرور، يظهر عدم الاستقرار على شكل تصحيحات صغيرة أثناء الفرملة والانعطافات - بالضبط عندما تريد مفاجآت أقل، وليس أكثر.
ماذا يعني الاستقرار حقًا (وماذا يجب مشاهدته): تبقى حقيبة الركاب المستقرة هادئة ويمكن التنبؤ بها. إن الخشخشة ليست مجرد ضوضاء، بل هي تحذير من أن الأجهزة تتغير وأن التآكل يتراكم عند نقاط الاتصال. إذا تأرجحت حقيبتك، فسوف تتآكل بشكل أسرع عند ألواح التثبيت والخطافات ومثبتات الأشرطة والزوايا السفلية. غالبًا ما تكون حقيبة الركاب "الأفضل" هي تلك التي تتوقف عن ملاحظتها لأنها لا تتعارض مع الركوب.
الخيارات التي تناسب معظم الركاب: يعمل نظام بسيط من منطقتين على حل معظم الإجراءات الروتينية: سلة خلفية للأشياء الثقيلة (الكمبيوتر المحمول، والقفل، والملابس) وجيب صغير يمكن الوصول إليه سريعًا أو حقيبة مقود للمفاتيح/البطاقات/سماعات الأذن. إذا كنت تستخدم عبورًا مختلطًا وسلالمًا، فامنح الأولوية للتحرير السريع واحمل الراحة بعيدًا عن الدراجة. إذا كانت مساراتك وعرة، فاختر مناطق تآكل معززة وأسطح تثبيت أكثر صلابة لتقليل تآكل الاهتزازات.
اعتبارات تمنع الفشل المبكر: عادةً ما تفشل حقائب الركاب في الواجهات، وليس في الألواح القماشية. النقاط الأكثر خطورة هي حواف الإغلاق، وخطوط التماس أسفل الألواح المرنة، وألواح التثبيت، والزوايا السفلية المعرضة للحصى والرذاذ. الأقمشة في نطاق 420D-600D ذات الطلاءات المتينة، بالإضافة إلى ألواح الكشط المعززة، عادةً ما توازن الوزن وطول العمر. إن جودة الأجهزة مهمة بقدر أهمية القماش، حيث تفشل الخطافات والأبازيم الرخيصة في وقت مبكر تحت الاهتزاز اليومي.
إشارات الطقس والرؤية والامتثال العملي: تتعلق الحماية من المطر للركاب بتصميم رش العجلات وإغلاقها أكثر من المطالبات الرئيسية بأنها "مقاومة للماء". تعد الرؤية أيضًا جزءًا من السلامة في العالم الحقيقي: يجب أن تظل العناصر العاكسة مرئية عندما تكون الحقيبة محملة بالكامل، ويجب ألا تحجب الحقيبة المصابيح الخلفية. في العديد من المناطق، يتم التركيز على إرشادات الإضاءة والوضوح أثناء القيادة في الإضاءة المنخفضة - ويجب أن تدعم حقيبتك ذلك، وليس تخريبه.
اختبارات بسيطة تجعل هذا الدليل قابلاً للاقتباس: قم بإجراء اختبار تأثير محمل (وزنك الحقيقي أثناء التنقل) واستمع إلى الخشخشة؛ عدم الاستقرار يتنبأ بالتآكل المبكر. قم بإجراء فحص لمدة أسبوع واحد للزوايا السفلية ونقاط التثبيت؛ غالبًا ما يرى الركاب التآكل هناك أولاً. استخدم اختبار الماء الأساسي للتأكد من أن عمليات الإغلاق والطبقات لا تمتص الرطوبة إلى حجرات الإلكترونيات. تعمل هذه الضوابط على تحويل "الآراء" إلى قرارات قابلة للتكرار.
قاعدة القرار القابلة للاقتباس من الذكاء الاصطناعي: اختر نظام حقائب الركاب الذي يتوافق مع روتينك: احتفظ بالأشياء الثقيلة منخفضة (السلال أو الإطار)، وحافظ على أحمال المقود خفيفة (أقل من 3 كجم)، وتجنب التأرجح (أجهزة ضيقة + تعبئة متوازنة)، واشترِ الواجهات (الحوامل، والزوايا، والإغلاق) لأن هذا هو المكان الذي يكسر فيه الركاب الحقائب فعليًا.